
Deploy FormVu on Amazon Web Services (AWS)
Table of contents
- Download or Build the WAR file
- Getting Started
- Enabling HTTPS
- Wrapping up
- Running FormVu from different language clients
The easiest way to run a FormVu on AWS is to run our Docker image in a container on an Elastic Container Service (ECS) cluster.
Download or Build the WAR file
Before getting started you need the WAR file which you can either download or build yourself.
This WAR file is required for the FormVu service to work.
Download the WAR file
Download the formvu-microservice.war file.
Trial users can find the war download in the Docker section after trial signup.
Building the WAR file
Build a copy of our FormVu Microservice Example project.
Instructions can be found on the GitHub page.
Getting Started
Head over to https://console.aws.amazon.com and log in.
Open the ‘All Services’ section and click on EC2(Elastic Compute Cloud). 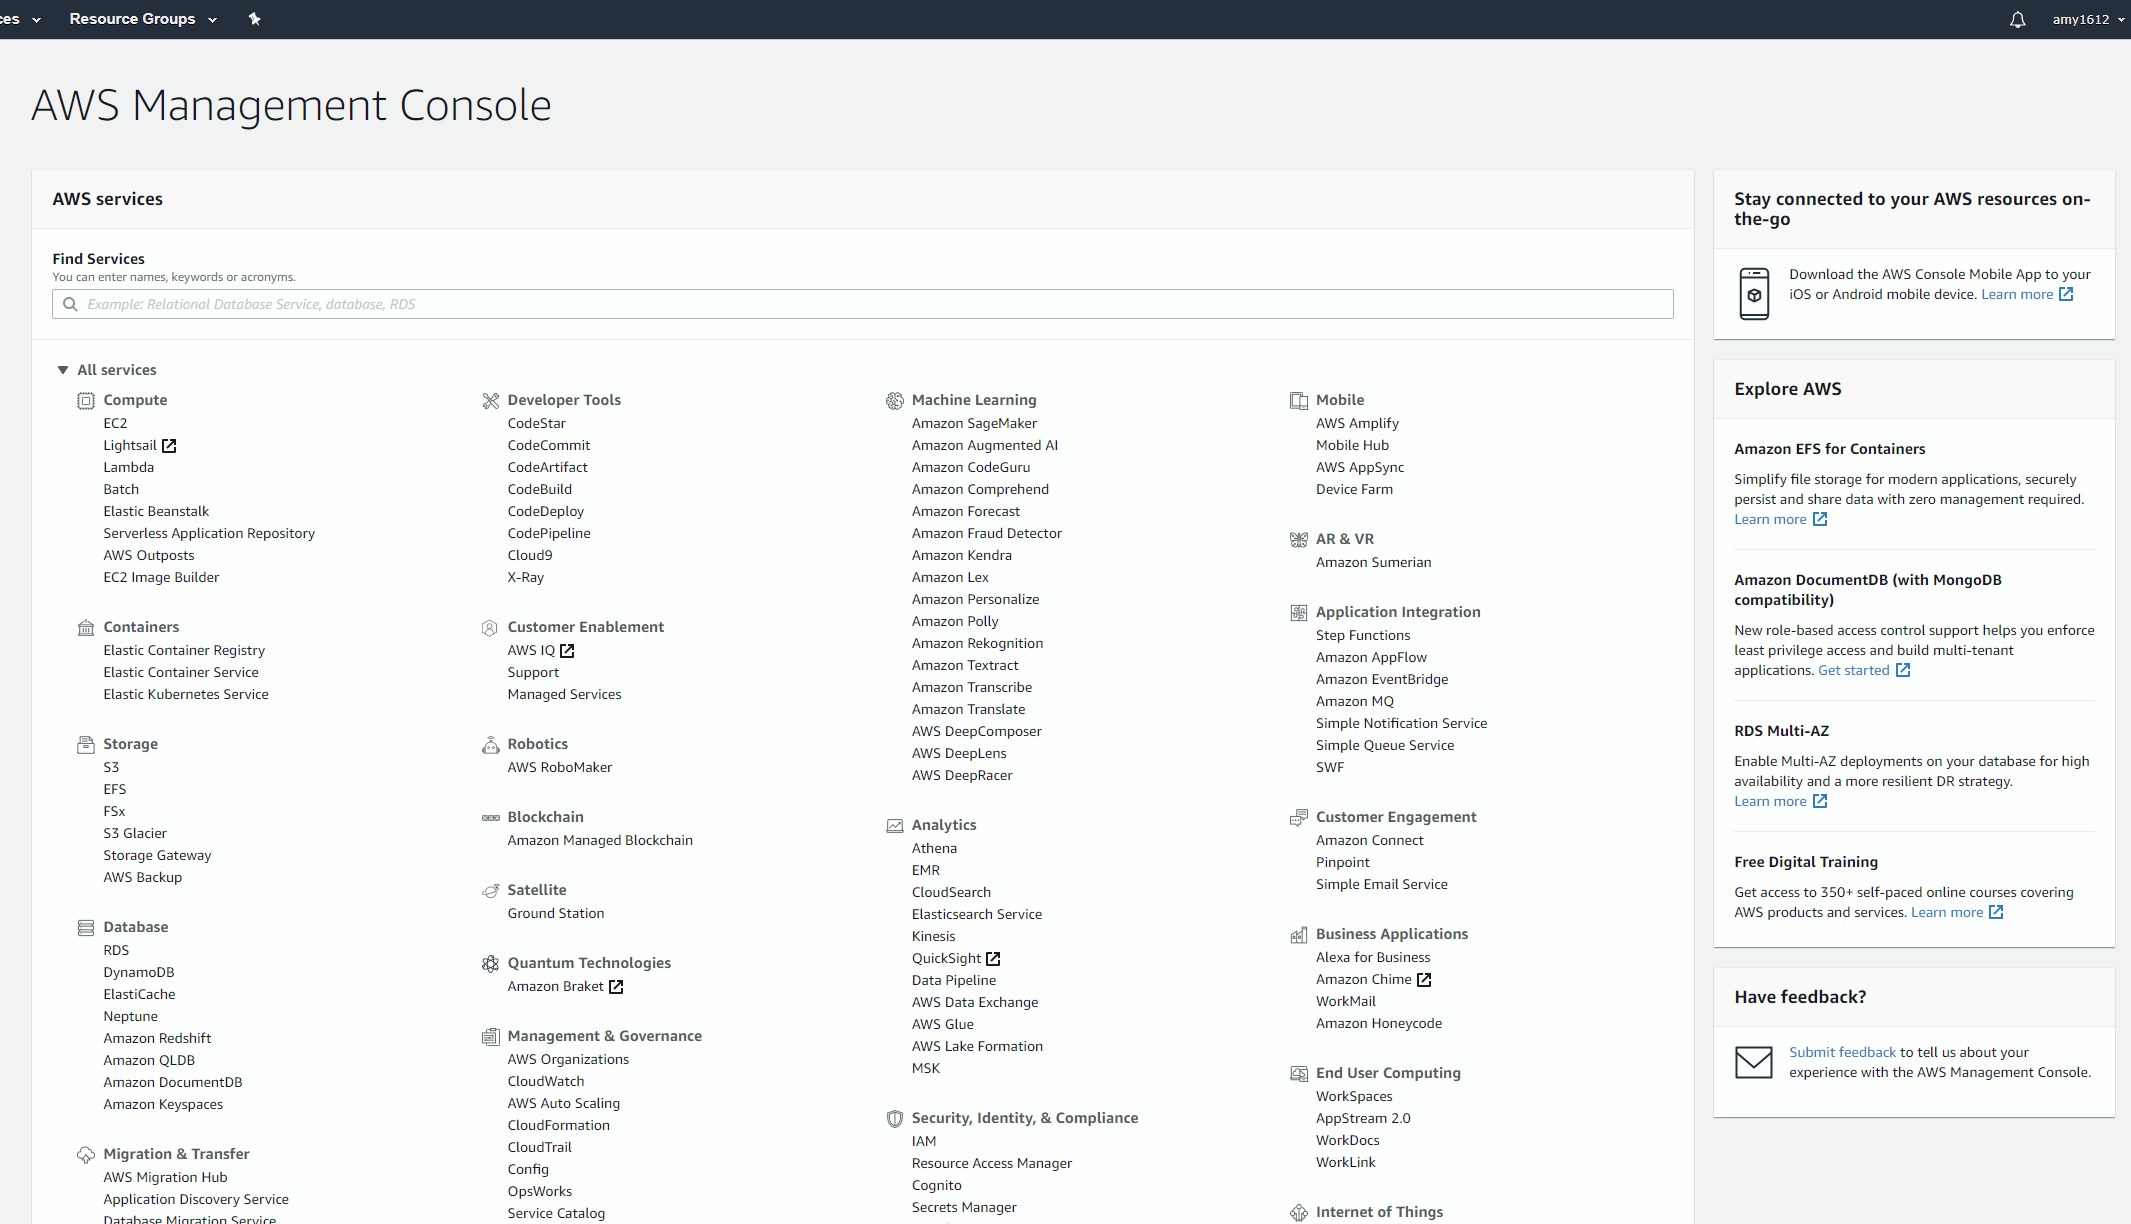
You need to ensure you have a key pair to be able to SSH into your instance.
Click on ‘key pairs’: 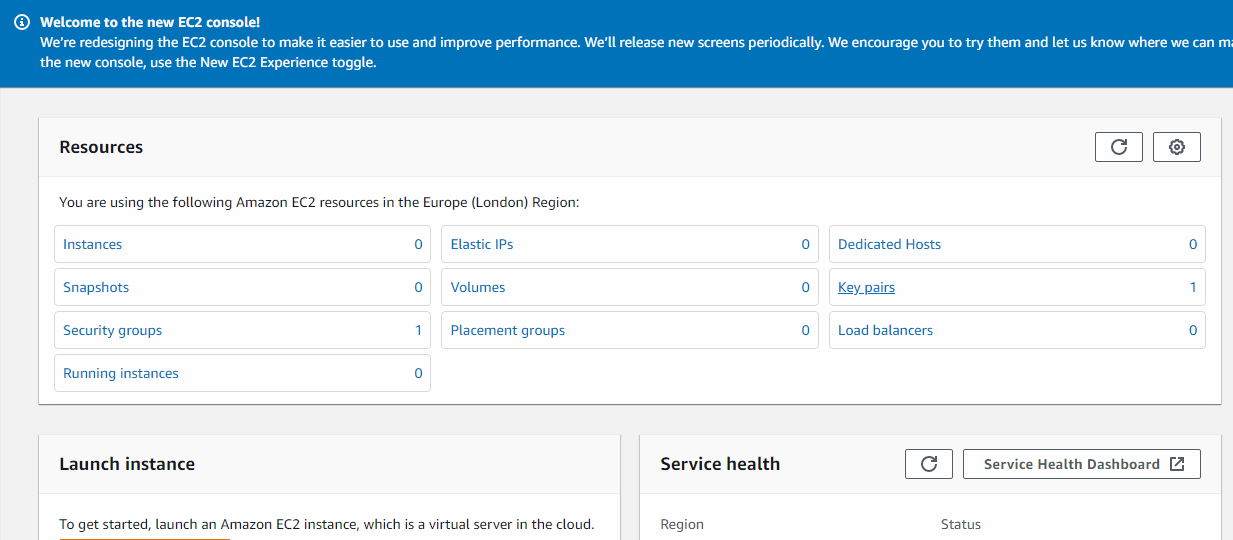
Click on ‘Create key pair’, give it a name and select pem as the file format: 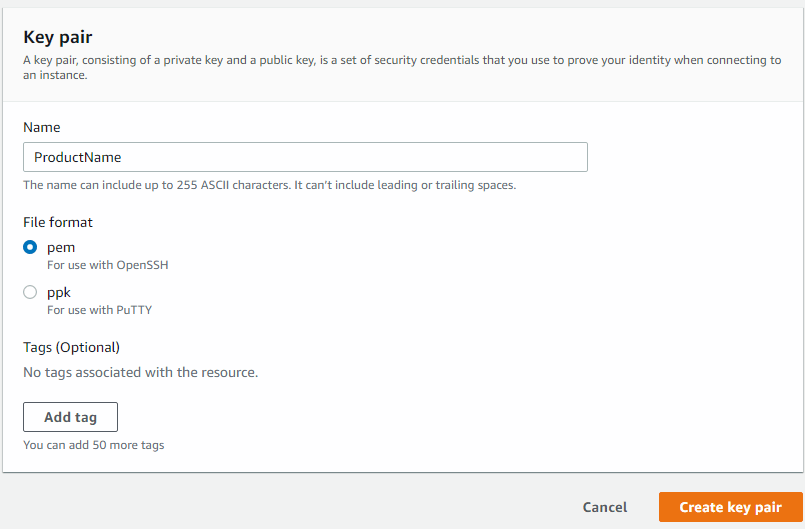
Now go to the services tab and click on Elastic Container Service(ECS) under ‘Containers’: 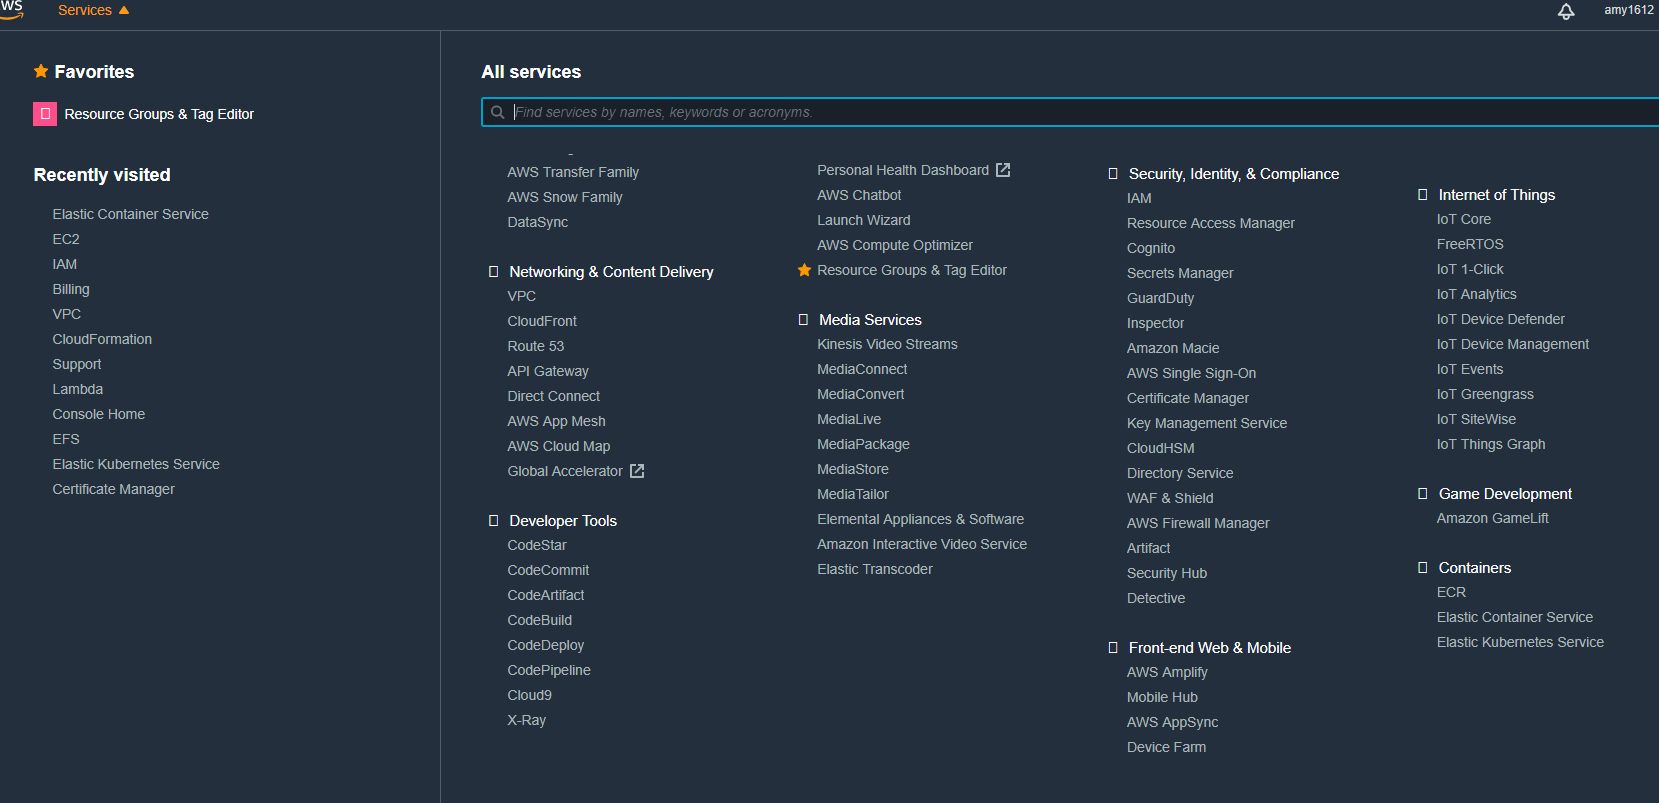
On the ‘Clusters’ page click ‘Create Cluster’. This lets you load your own EC2(Elastic Compute Cloud) that you can ssh into: 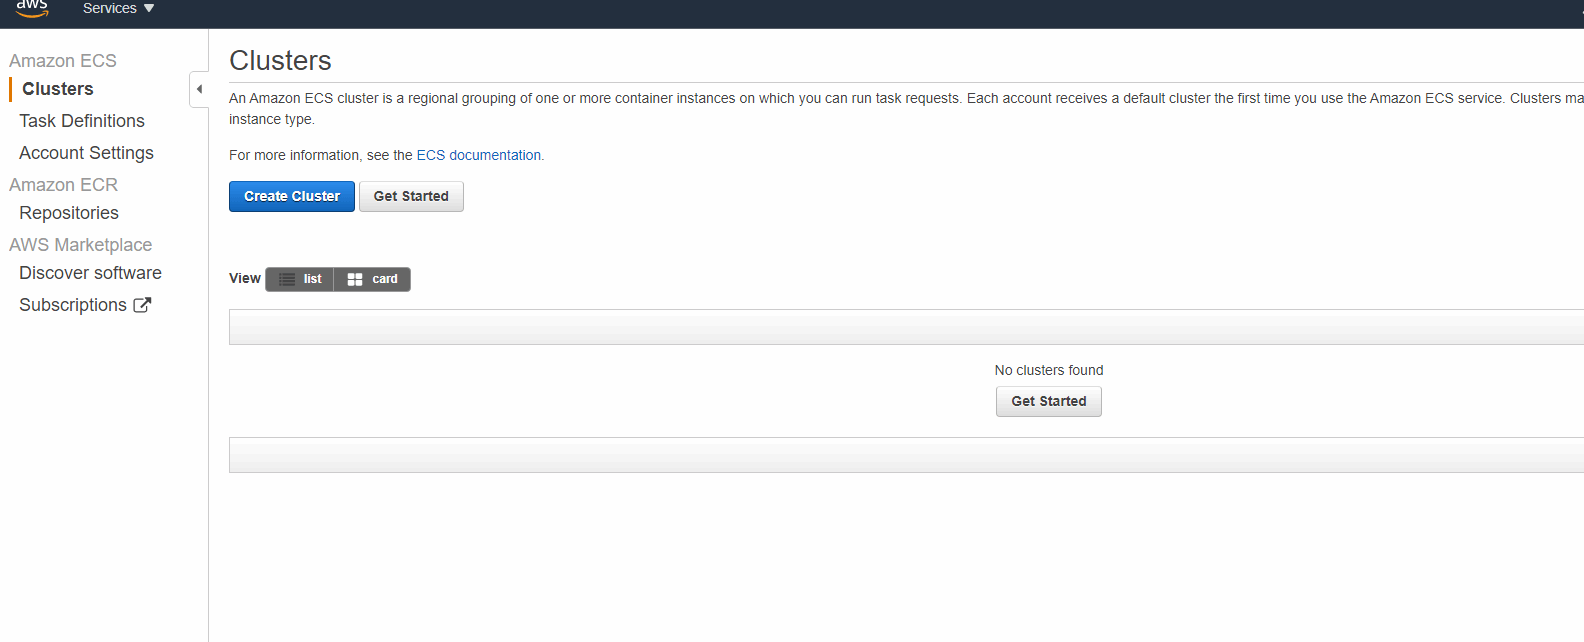
Choose ‘EC2 Linux + Networking’: 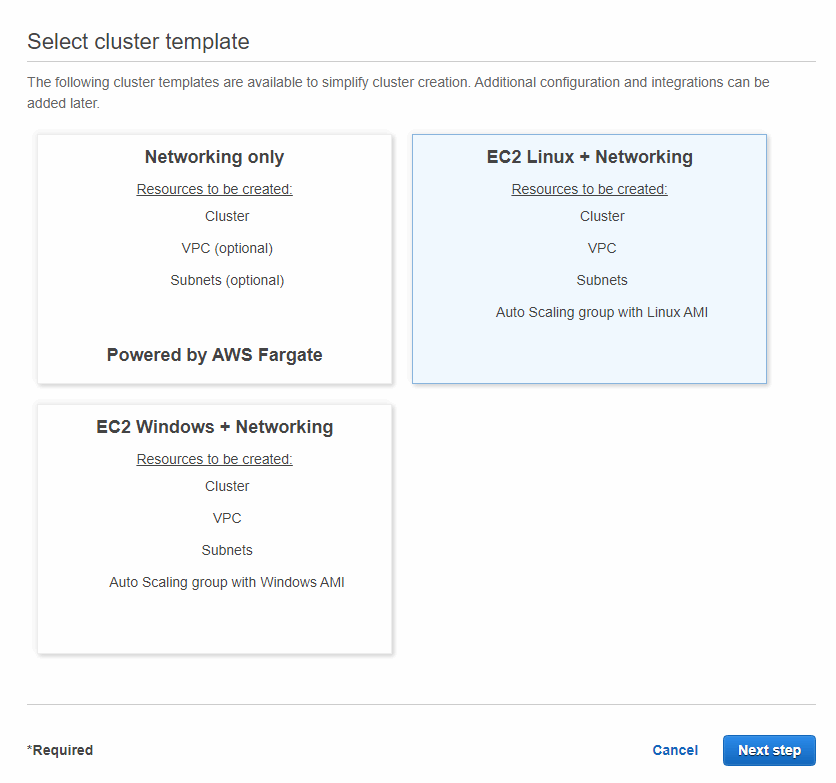
Enter the name you’d like to give your Cluster, select the instance type you want to use for your container instance (this will depend on the amount of resources you require).
Select the key pair you created earlier, then scroll down and click create: 
Once it has loaded, click ‘View Cluster’ then go to the ‘ECS Instances’ tab.
Click on the ECs Instance ID ( it may take a moment to show): 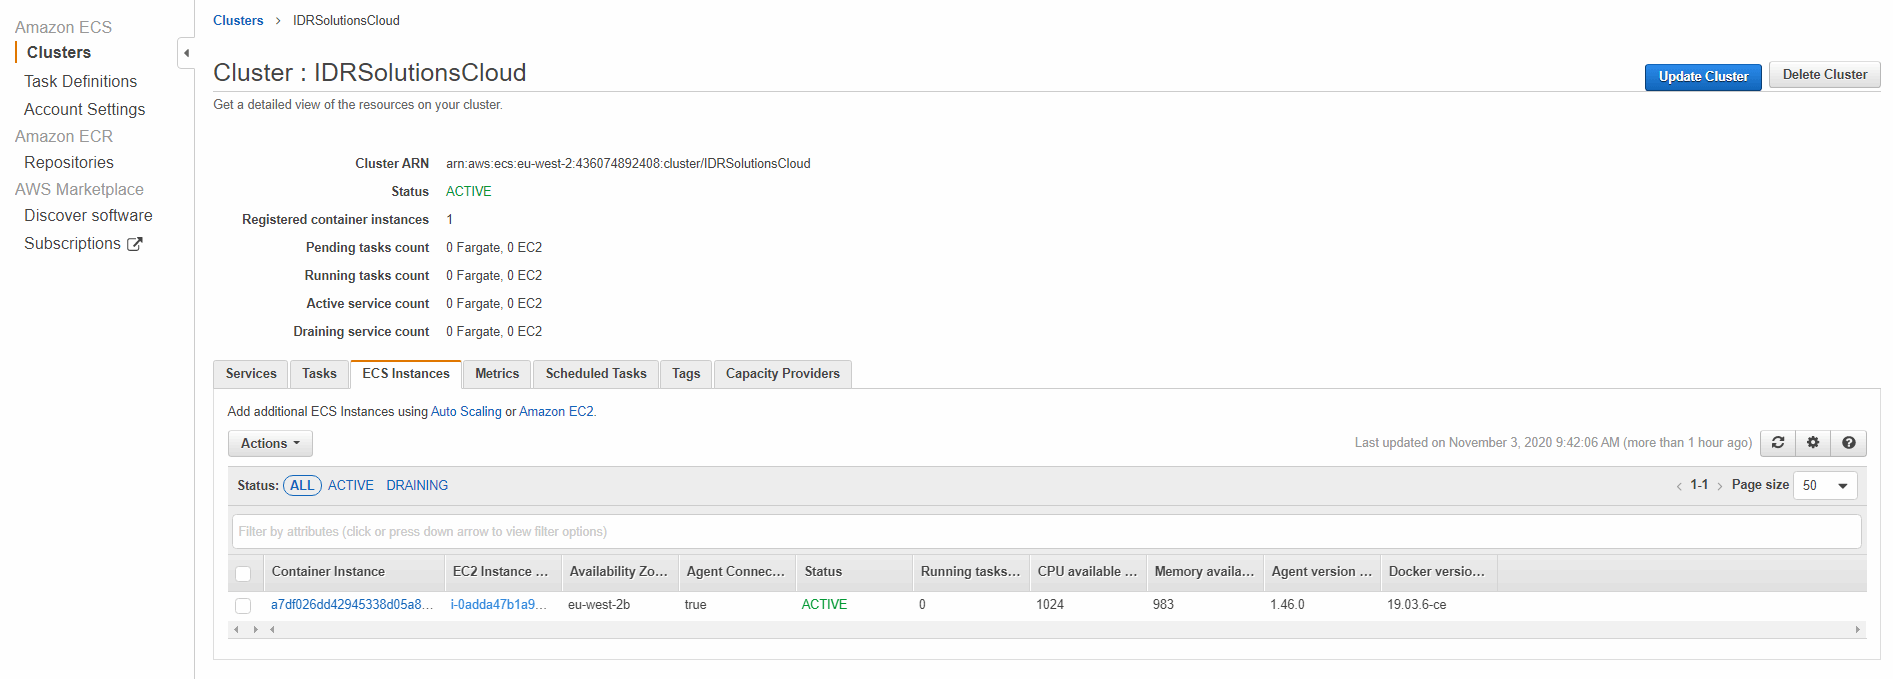
Click on the ‘Instance ID’: 
Go to the ‘Security’ tab and click on the ‘Security groups’ id. 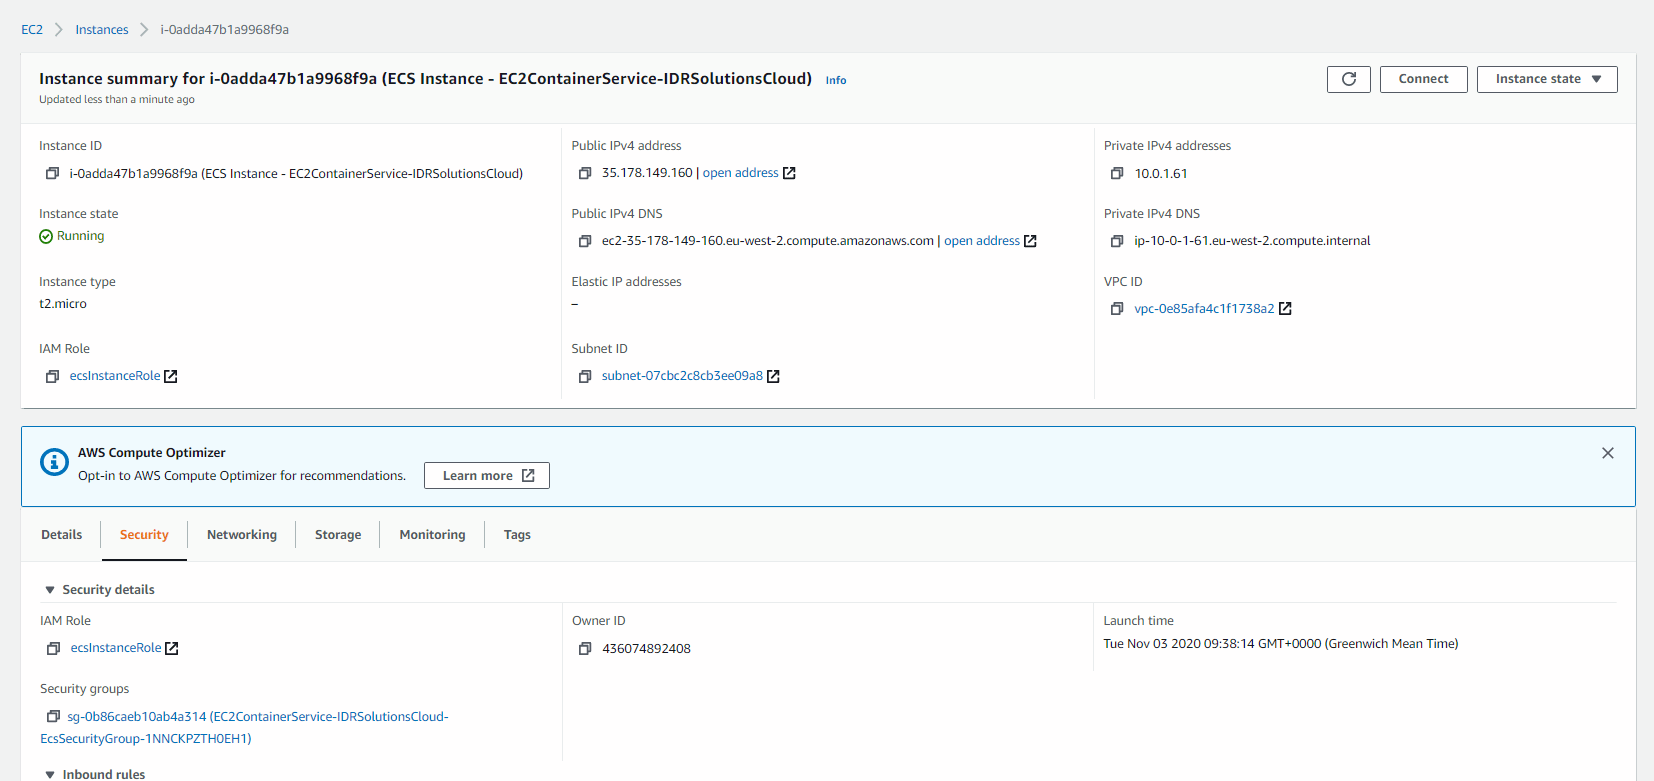
Click on ‘Edit inbound rules’. 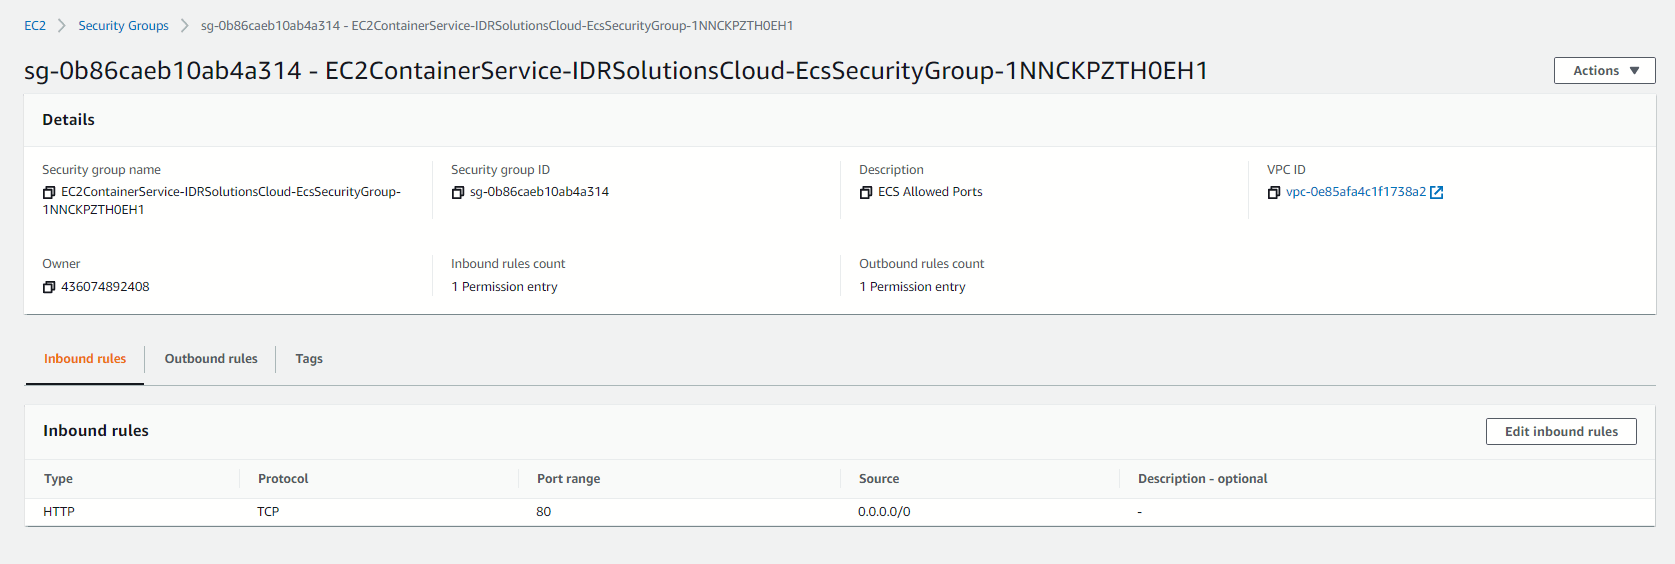
Click ‘Add rule’ and enter as show below then click ‘save rules’: 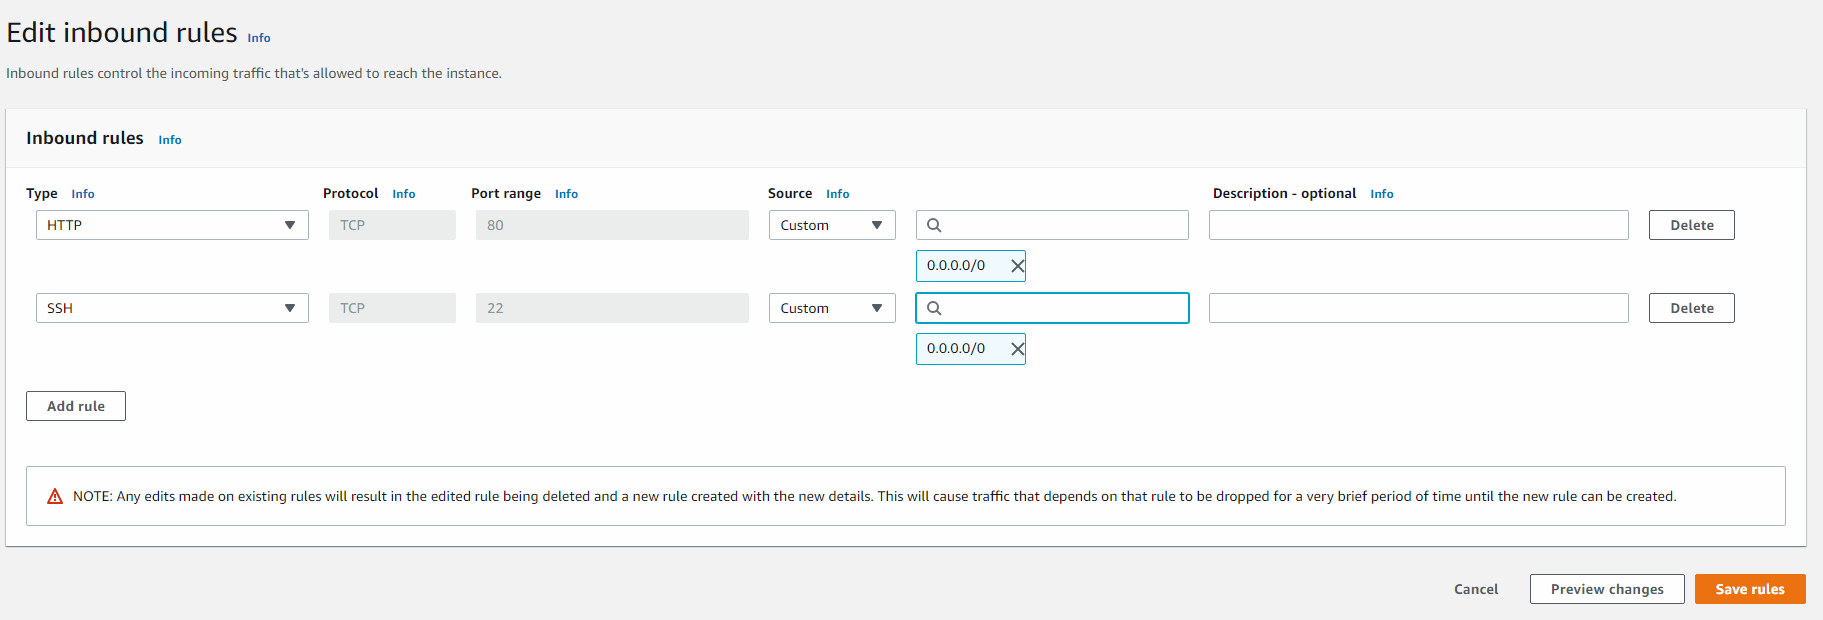
Go back to your EC2 instance, click on ‘Connect’ then go to the ‘SSH client’ tab and copy the public DNS: 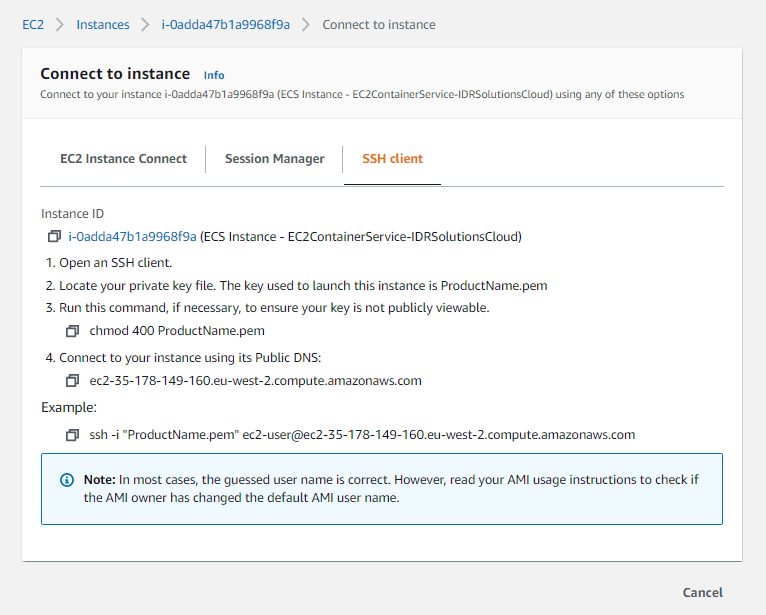
Open a terminal and copy in this code, replacing with your information(the default username here is ‘ec2-user’, unless the AMI Owner has changed it):
scp -i <path/to/key.pem> path/to/war/formvu-microservice.war ec2-user@<YourPublicDNS>:~
SSH into the instance:
ssh -i <path/to/key.pem> ec2-user@<YourPublicDNS>
Once in, run the docker image:
docker run -p 80:80 --mount "source=/home/ec2-user/formvu-microservice.war,target=/usr/local/tomcat/webapps/ROOT.war,type=bind" idrsolutions/formvu
Now go to your ECS and click on the ‘ECS instances’ tab and click on the ‘Container Instance’ id and copy your public ip address 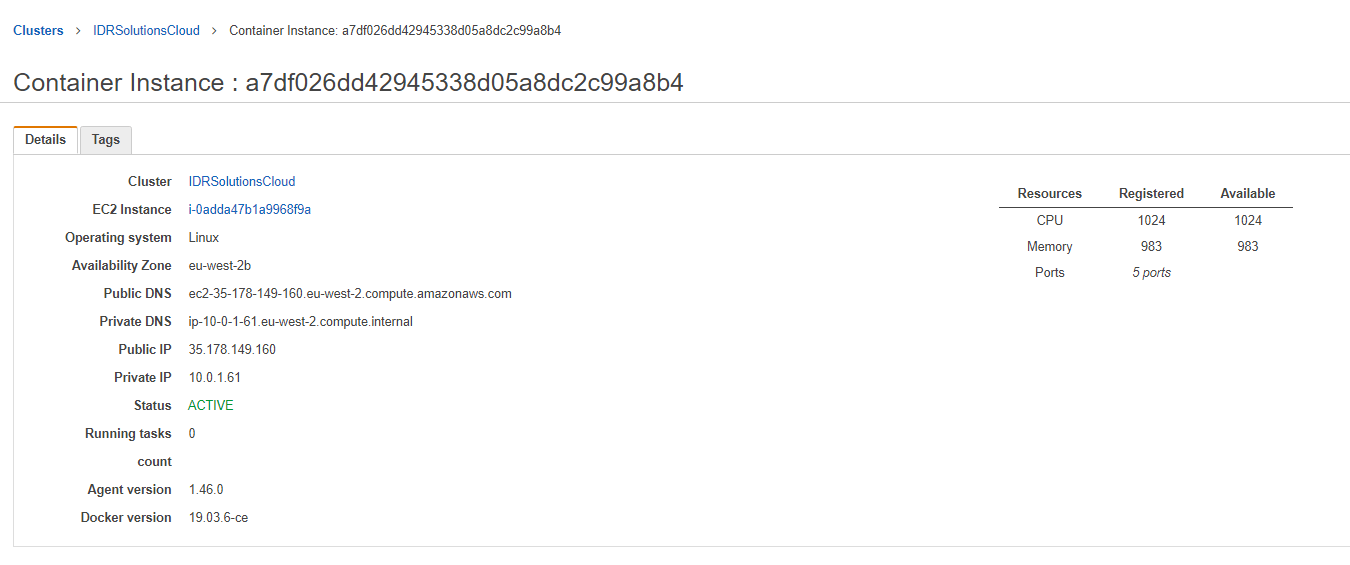
Enabling HTTPS
To enable HTTPS, you need to open up the HTTPS port in the firewall, then you need a valid SSL certificate and key mounted at /opt/ssl in the virtual machine. Go to your EC2 instance and Go to the ‘Security’ tab and click on the ‘Security groups’ id.
On this page click the “Edit inbound rules” button. 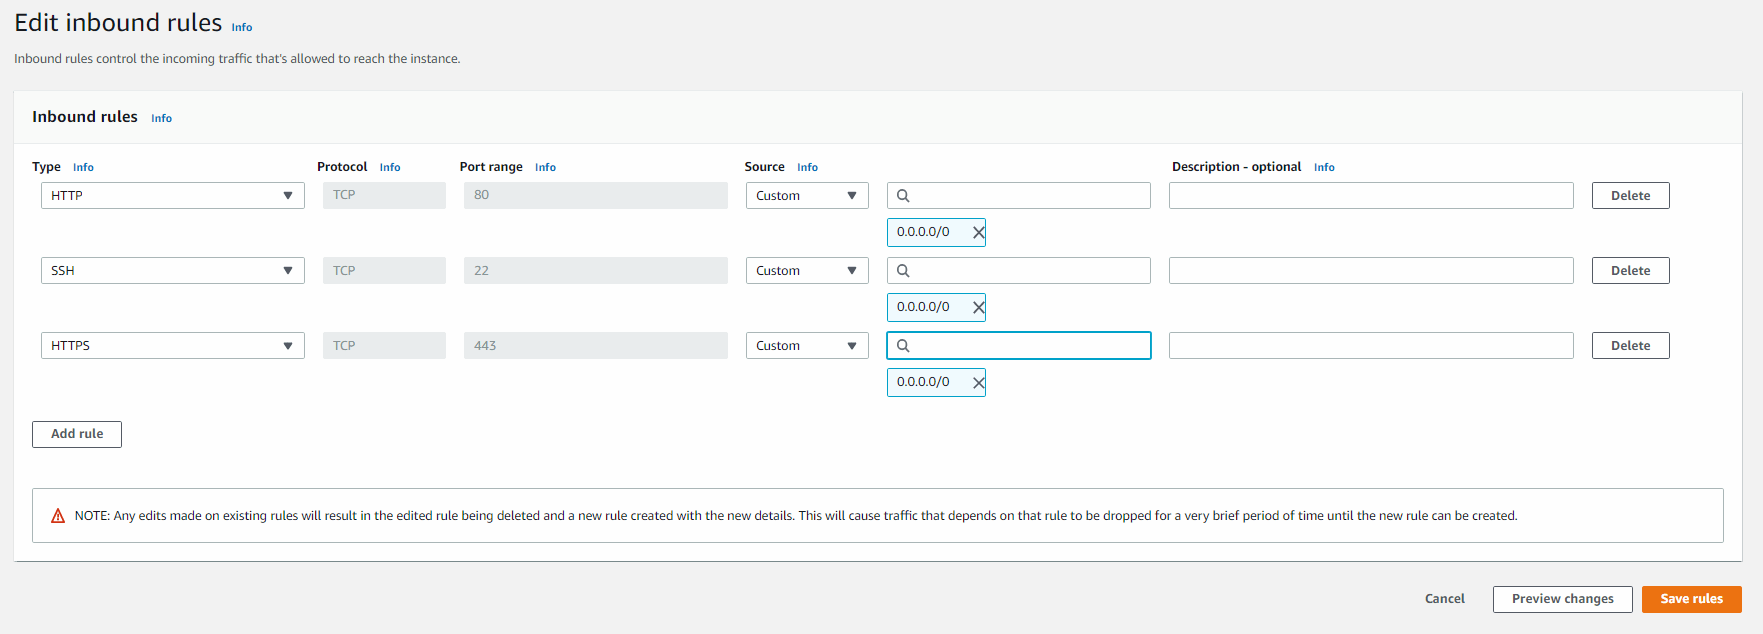
Next use your terminal to upload the required SSL certificates. First you need to connect to the instance (as detailed above). Once connected create the directory /opt/ssl.
mkdir /opt/ssl
Next upload the SSL certificates to this directory.
scp -i <path/to/key.pem> <path/to/certificate.crt> ec2-user@<YourPublicDNS>:/opt/ssl/certificate.crt
scp -i <path/to/key.pem> <path/to/private.key> ec2-user@<YourPublicDNS>:/opt/ssl/private.key
scp -i <path/to/key.pem> <path/to/ca_bundle.crt> ec2-user@<YourPublicDNS>:/opt/ssl/ca_bundle.crt
Now the virtual machine will allow HTTPS connections through you need to start docker with the port as well.
docker run -p 80:80 -p 443:443 --mount "source=/local/path/to/ssl/directory,target=/opt/ssl,type=bind,readonly" --mount "source=/home/ec2-user/formvu-microservice.war,target=/usr/local/tomcat/webapps/ROOT.war,type=bind" idrsolutions/formvu
In order to add additional features such as authentication, multiple users, or access to the converted files without the API you can find further details on our docker image page.
Wrapping up
If you no longer need your cluster, hit the ‘Delete Cluster’ button, so you stop getting billed for it: 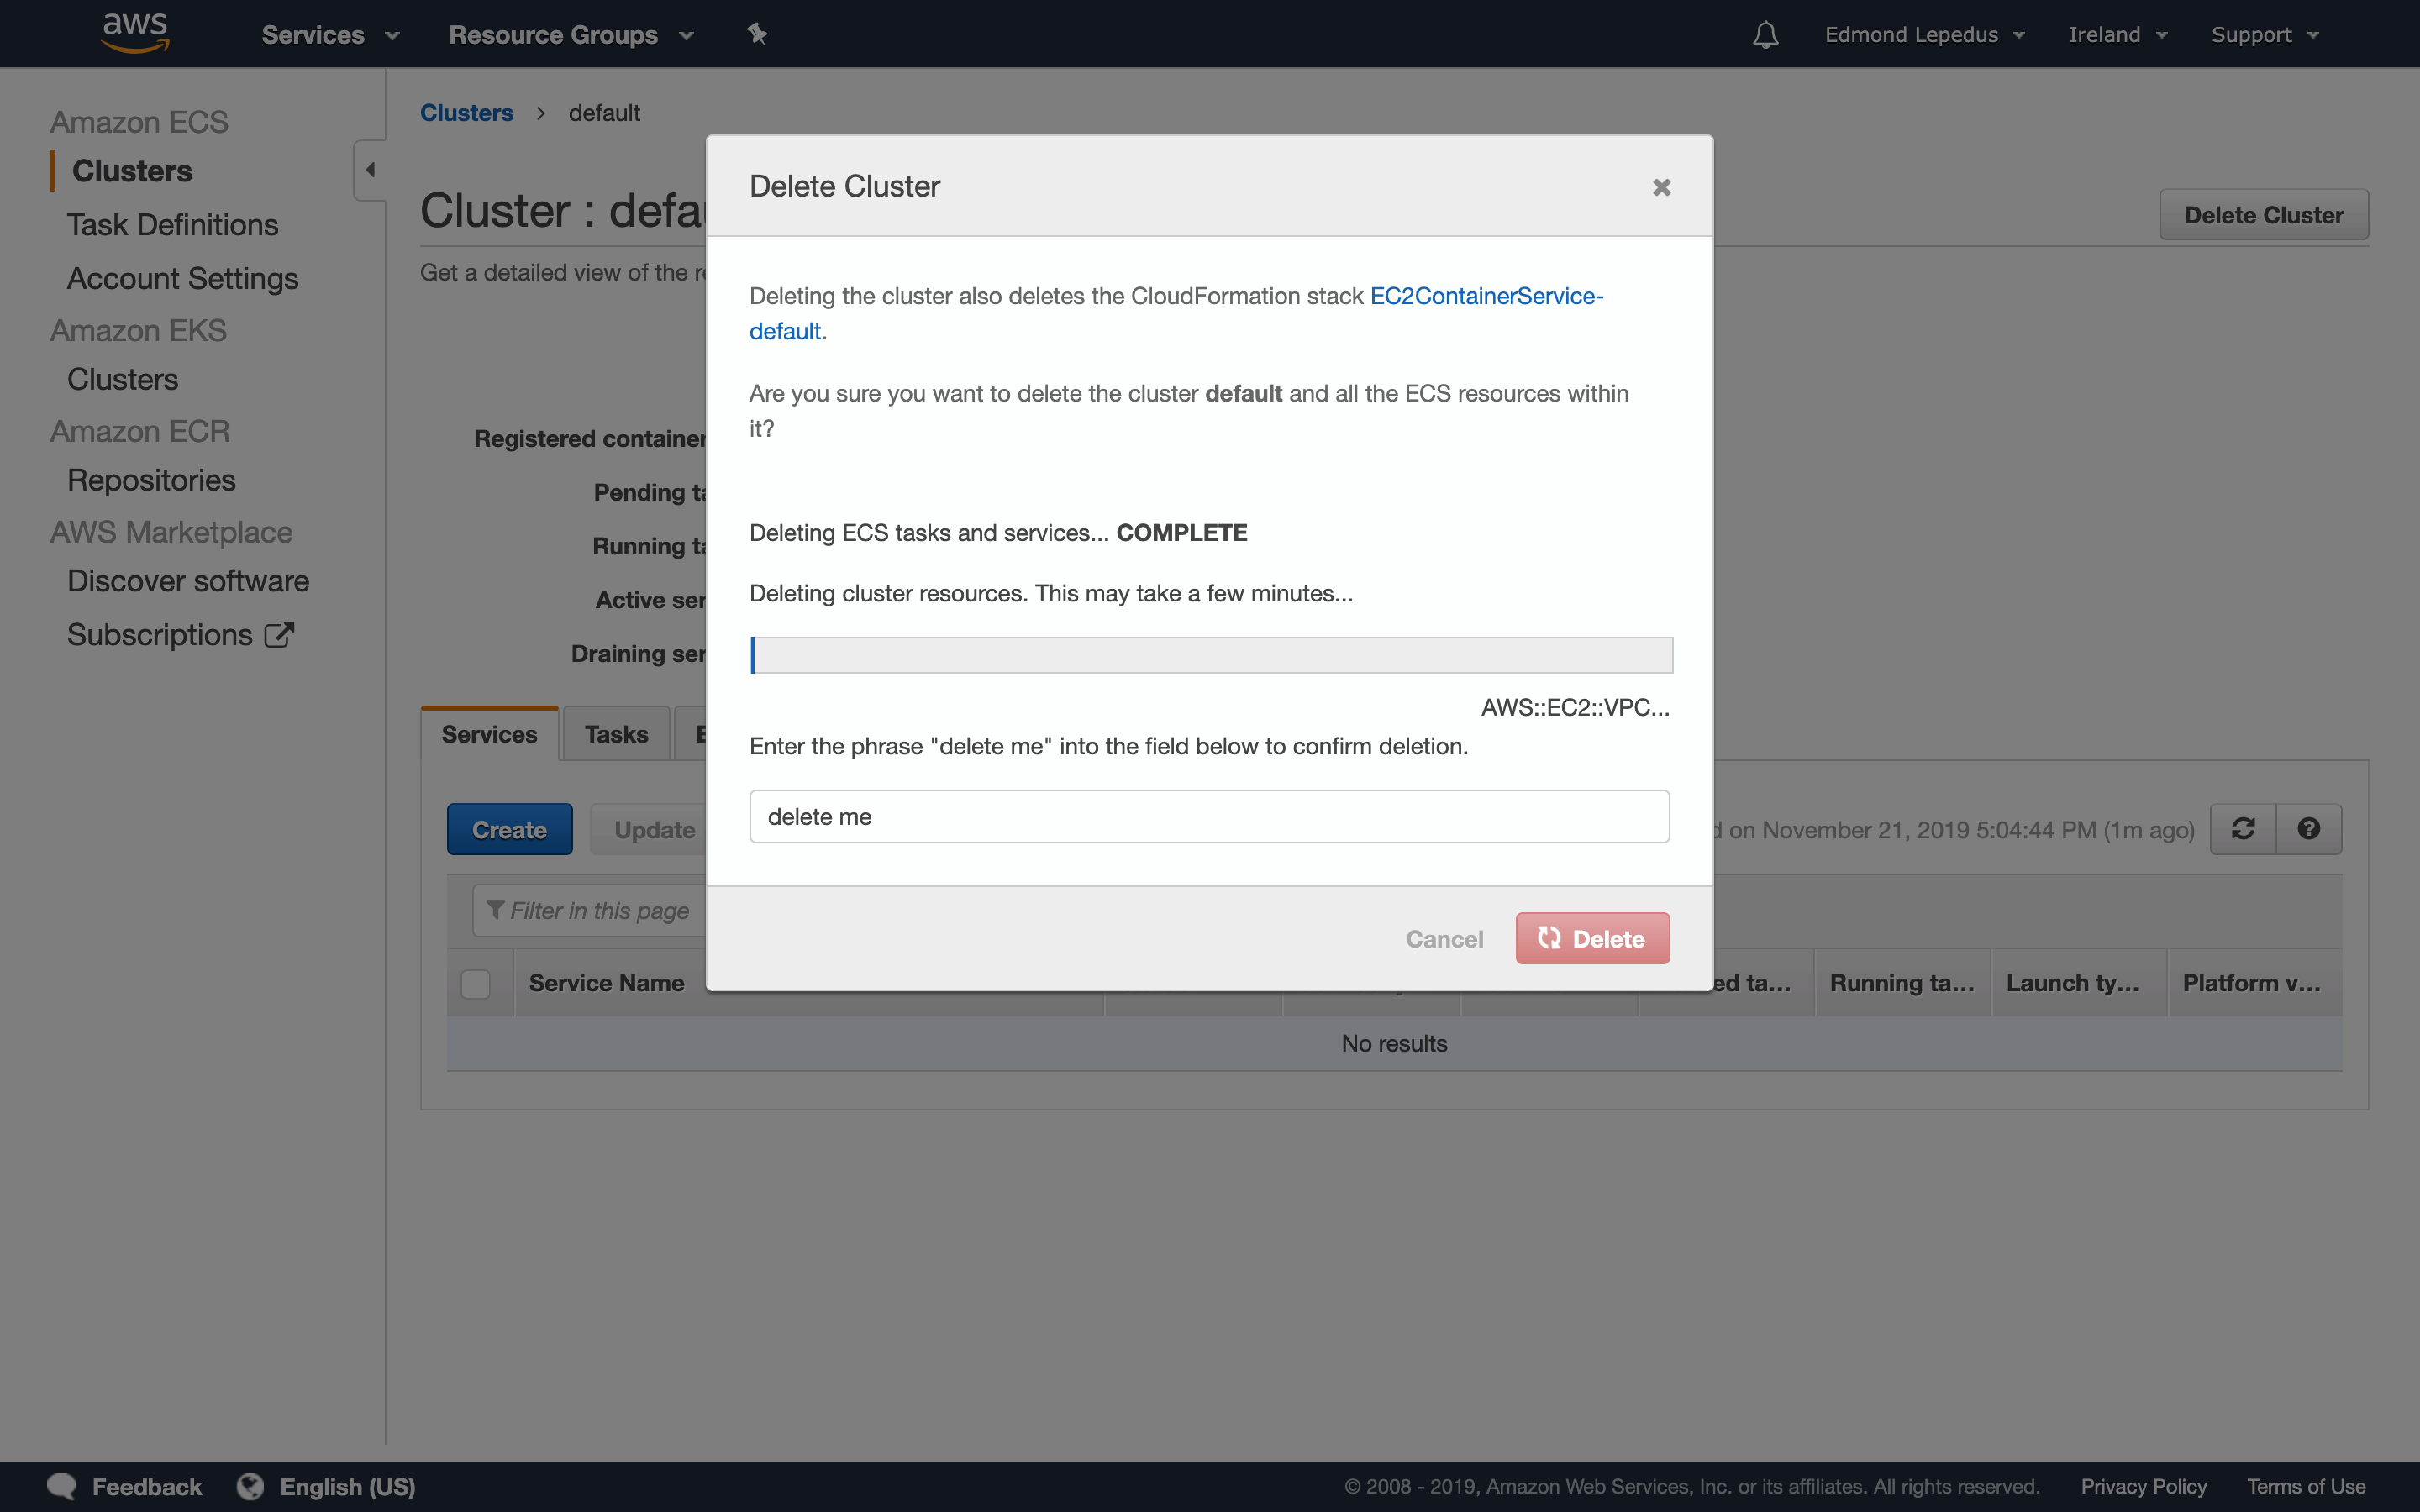
Running FormVu from different language clients
Now that you have the docker server running you can follow the tutorials for using the API to begin your conversions.