
Deploy BuildVu with GlassFish
Table of contents
- Compatibility Warning
- Download or Build the WAR file
- Deploying the web app
- Usage
- Storing the conversion state externally
Compatibility Warning
Glassfish 6 has moved from using JavaEE to using JakartaEE. As it no longer supports JavaEE packages you will need to use Glassfish 5.
As of January 2021, GlassFish 5 is not compatible with Java 10 or higher. If you are using Java 10 or higher, you will need to configure the server to use a Java 9 or lower SDK.
To do so, navigate to /glassfish/config/ and change the following:
Windows:
asenv.bat - Add "set AS_JAVA=PATH\TO\JDK.jdk"
For example: "set AS_JAVA=C:\Program Files\Java\jdk1.8.0_172.jdk"
Mac:
asenv.conf - Add "AS_JAVA=/PATH/TO/JDK.jdk"
For example: "AS_JAVA=/Library/Java/JavaVirtualMachines/jdk1.8.0_172.jdk"
Download or Build the WAR file
Before getting started you need the WAR file which you can either download or build yourself.
This WAR file is required for the BuildVu service to work.
Download the WAR file
For trial users:
- If you haven’t already, sign up for BuildVu trial.
- Open the email you receive when you signed up.
- Follow the download link found in the Docker section.
For customers:
- Visit the Customer download page.
- Click on ‘Download Latest Customer WAR’.
- Submit your username and password.
Build the WAR file
Build a copy of our BuildVu Microservice Example project.
Instructions can be found on the GitHub page.
Deploying the web app
- Download and install the latest version of GlassFish. You can use either the Web Profile or the Full Platform. (Versions tested: 4.X, 5.0)
- Start GlassFish and navigate to the admin console in your browser.
- For example, the command
glassfish5/glassfish/bin/asadmin start-domainwill start the server on port 8080, with the admin console on port 4848 - check theREADME.txtsupplied with GlassFish for detailed instructions.
- For example, the command
- On the home page, click on ‘Applications’ from the menubar on the left, then click ‘Deploy’.
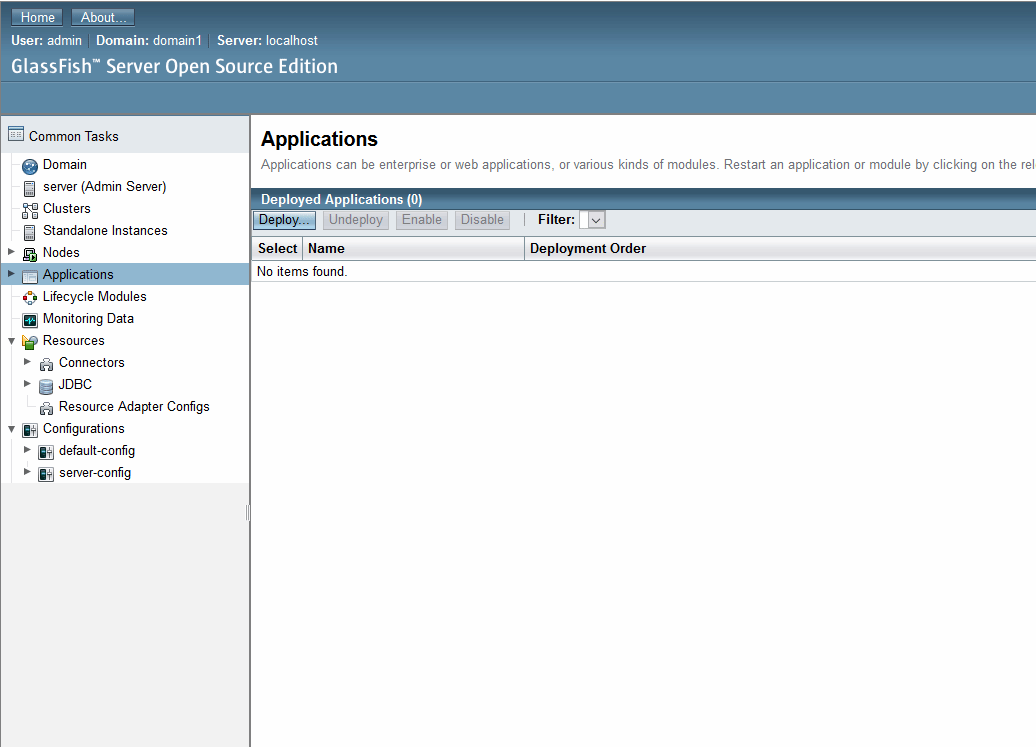
- You should now be on the Deploy page as show below.
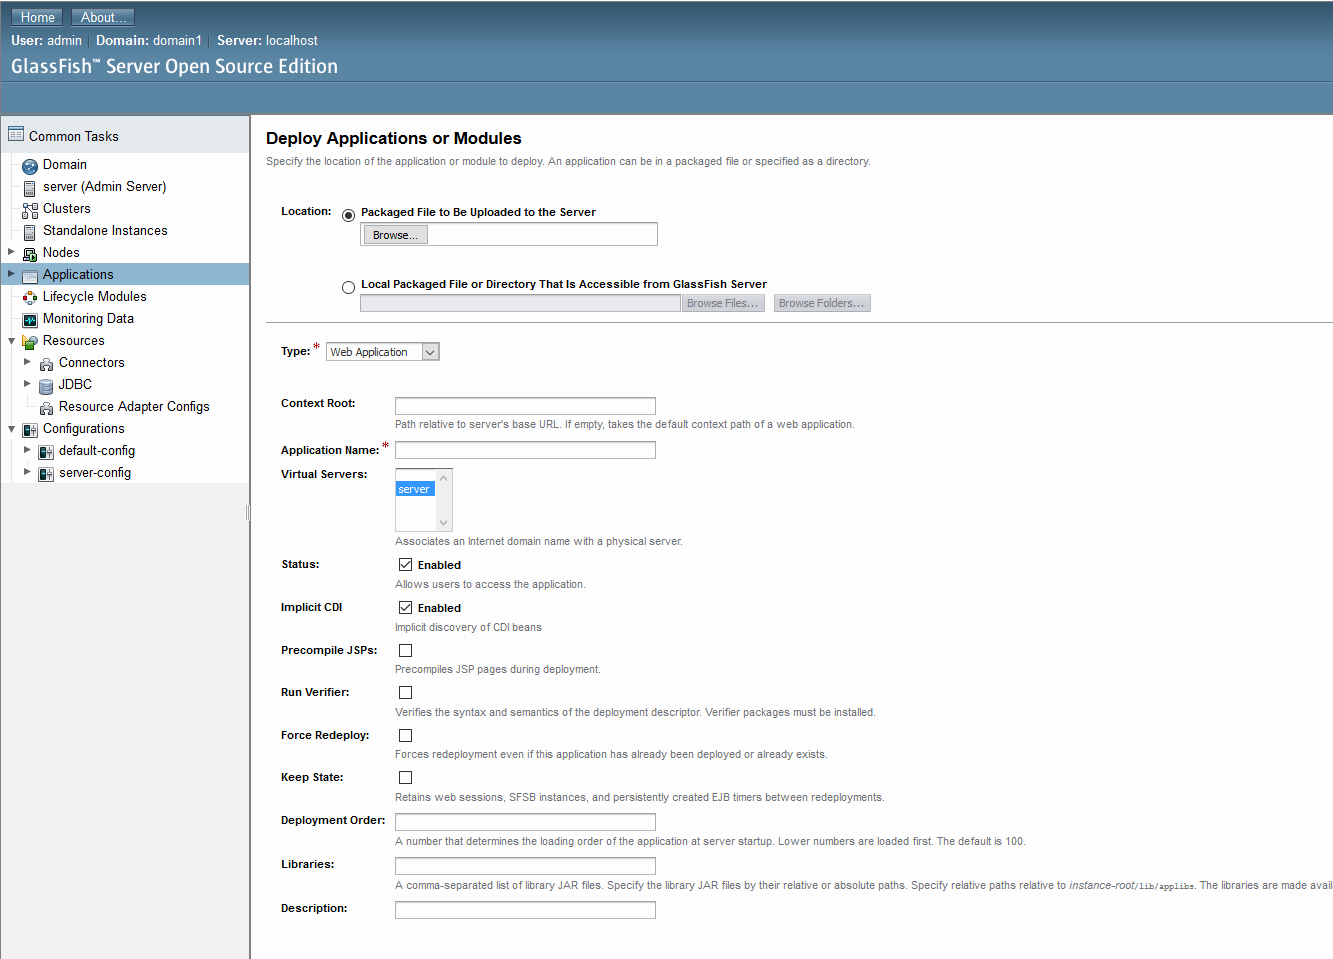 You should enter the following values.
The remaining options can be left as their default values or configured however you wish.- Upload the .war file you built earlier or Provide GlassFish with the path to it.
- Set Type to ‘Web Application’.
- Set a Context Root. If left empty, the default context root (usually the name of the .war file) will be used. For example, if your server is located at
localhost:8080and you’ve set the web app’s context root tobuildvu-microservice, you can find it atlocalhost:8080/buildvu-microservice. - Set a Virtual Server - Make sure you have a server selected, or the web app will fail to deploy.
- Click OK and you’re done!
You can check if the web app has successfully deployed by navigating to its URL in your browser - you should see a blank white page with BuildVu Microservice Example written in the centre.
Usage
You can interact with the BuildVu Microservice Example using the REST API (See the GitHub page for details).
For specific languages, see our tutorials.
Storing the conversion state externally
In some cases you may want to store the state of the program externally in a database, for example you may want to preserve the program’s state in the event of a server failure.
In order to do this, you must create a datasource on Glassfish and add it’s JNDI name to the microservice config.
Setting up a datasource
Installing the database Driver
First we need to install the database driver jar into glassfish. Glassfish does have some database drivers installed by default, like MySql, Oracle, and MicrosoftSqlServer, so this step might not by necessary for your use case.
To do install a new database driver, run asadmin, start your domain, and execute the following:
add-library "PATH/TO/DATABASE/DRIVER.JAR"
This will automatically setup the driver in glassfish so it can be used when setting up the datasource.
Setting up the datasource
Next we need to create a datasource in the admin panel
Navigate to the admin panel (by default this can be accessed at localhost:4848, then, using the navigation menu on the left, navigate to JDBC -> JDBC Connection Pools)
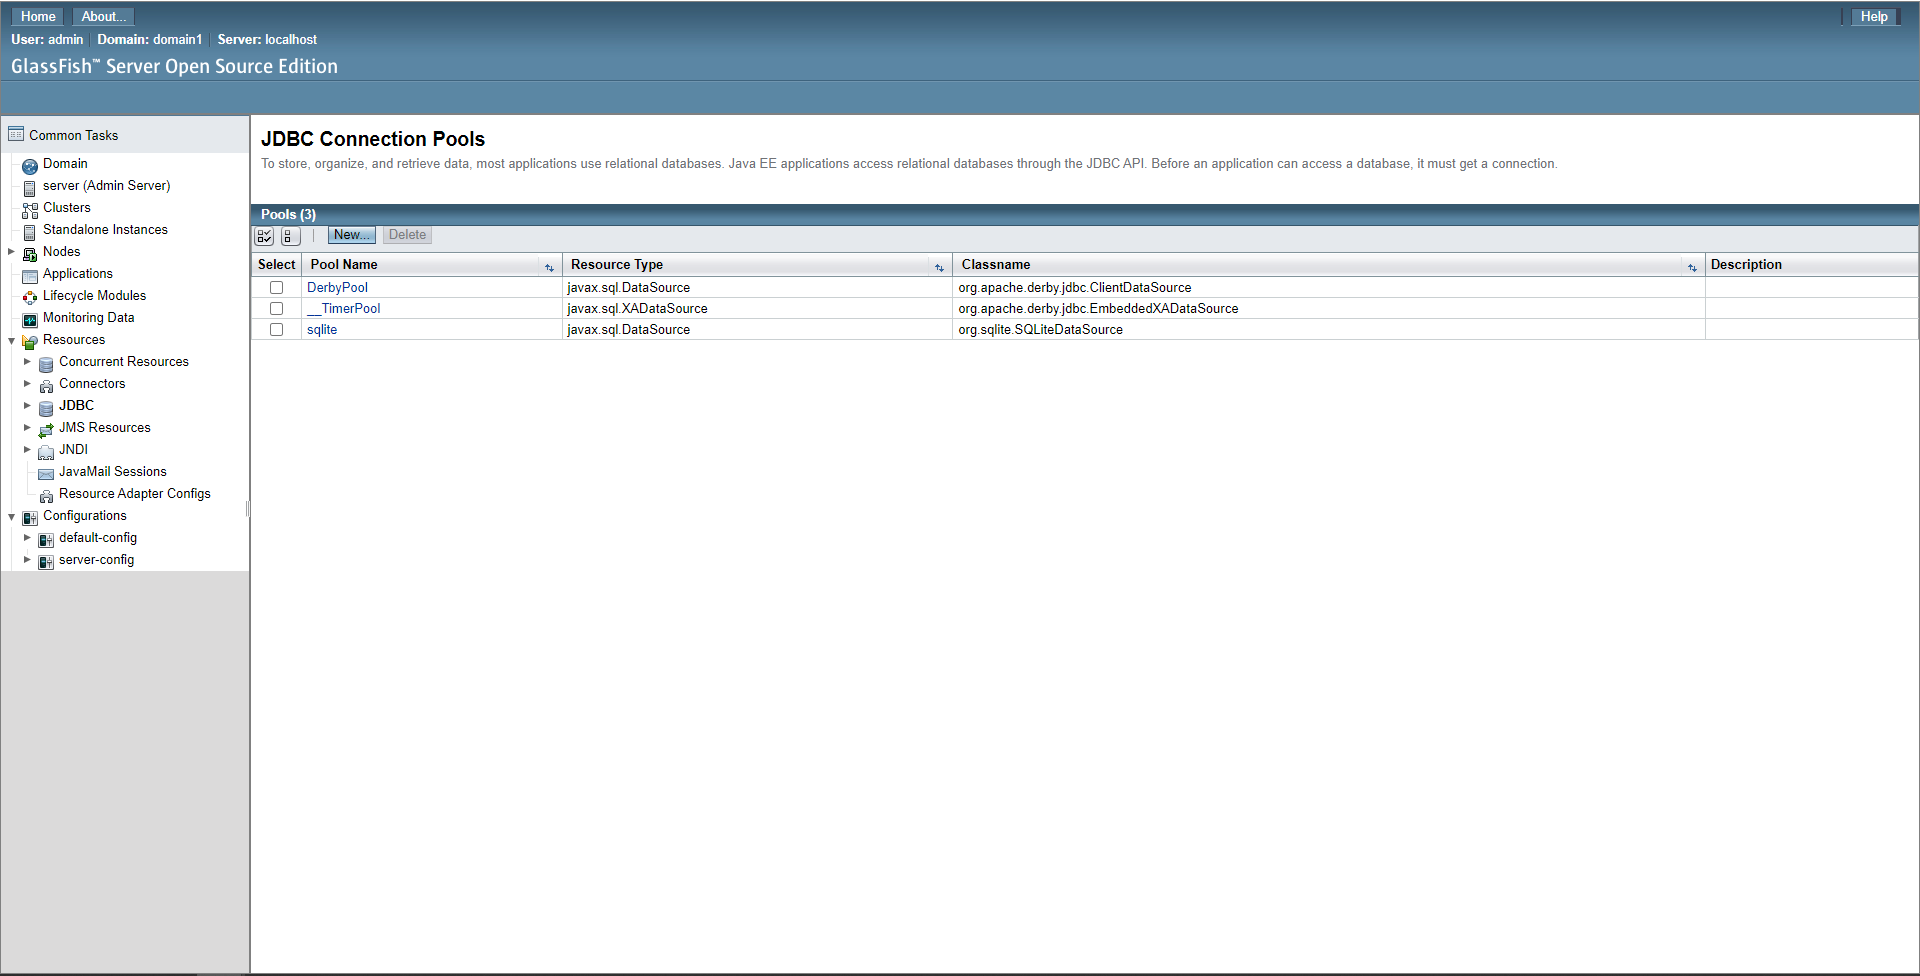
Create a new pool, give it any name, set the type to javax.sql.DataSource, and set the Database Driver Vendor the name of your database driver (for example: sqlite, mysql, mariadb).
Then click next
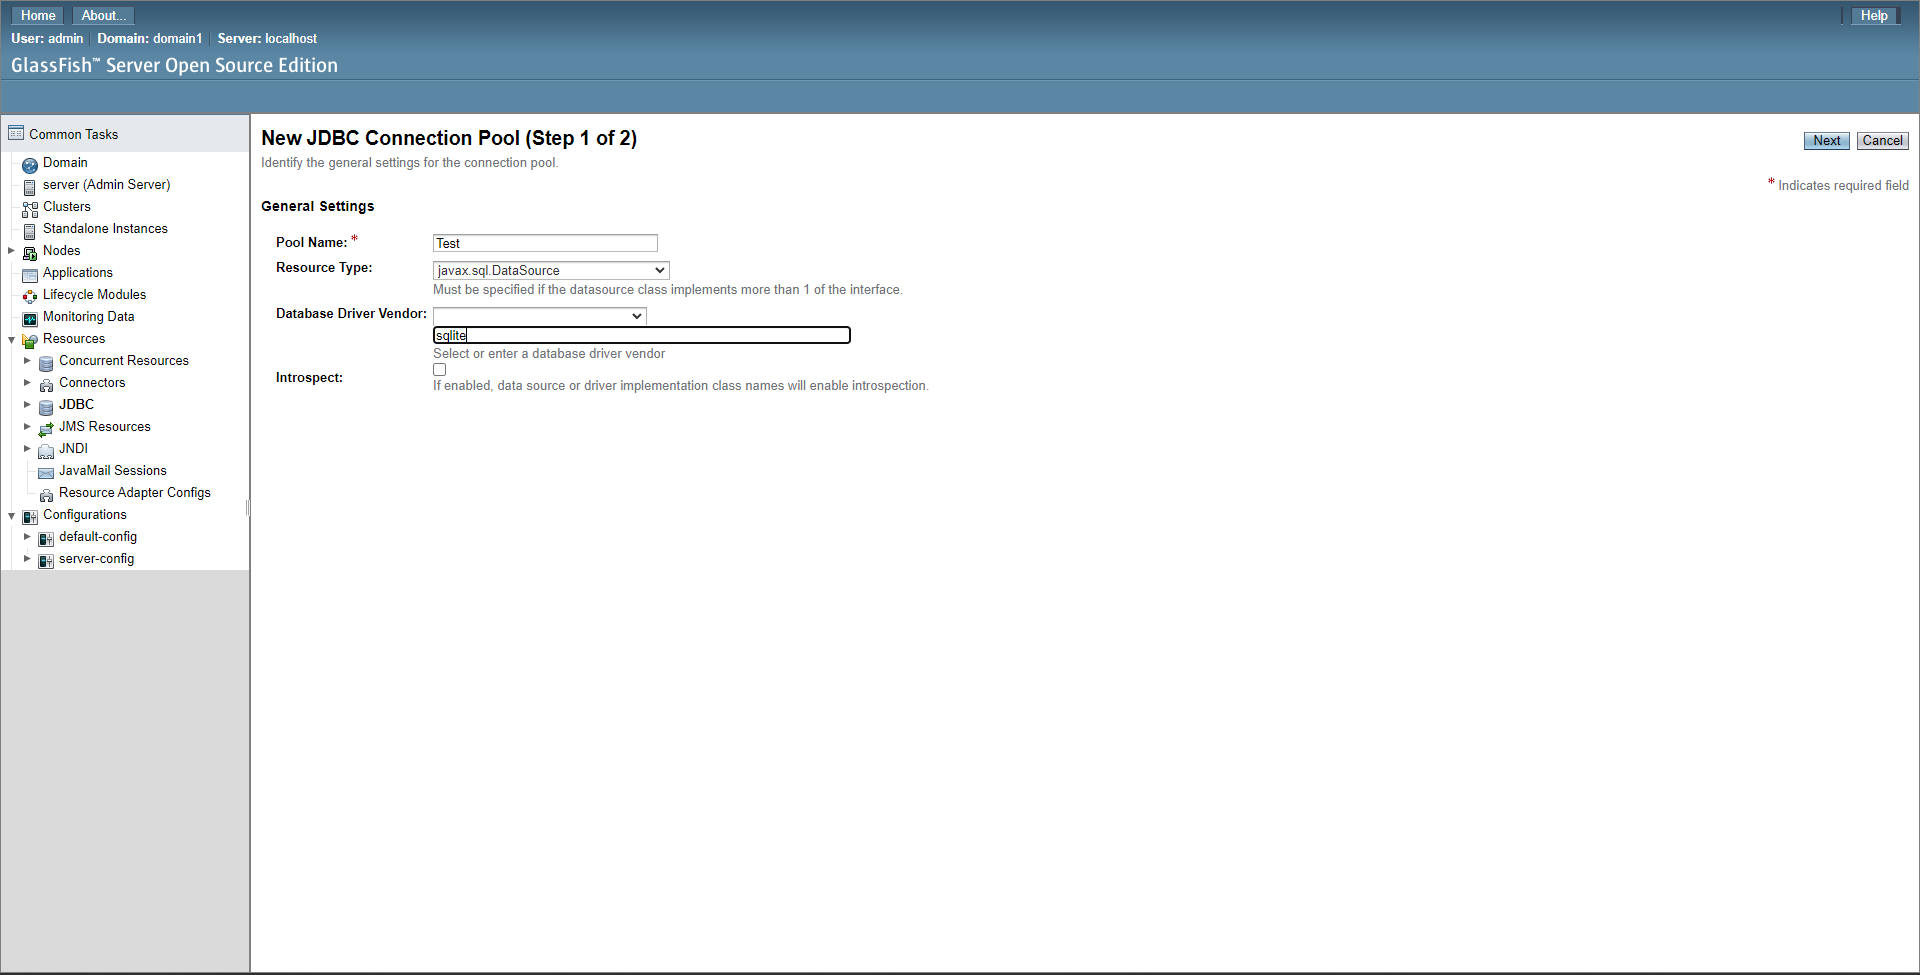
Note: This example image uses SQLite, which needs to be entered manually, drivers may be available in the drop down box above the input.
On the next screen, set the datasource Classname to the datasource class of your database driver (which can be found in the driver’s documentation, if it hasn’t been autofilled for you), set the pool settings to taste, then scroll down to additional properties and fill these in. If no properties have been automatically added then you can find the properties you need in your driver jar’s documentation.
Then click finish

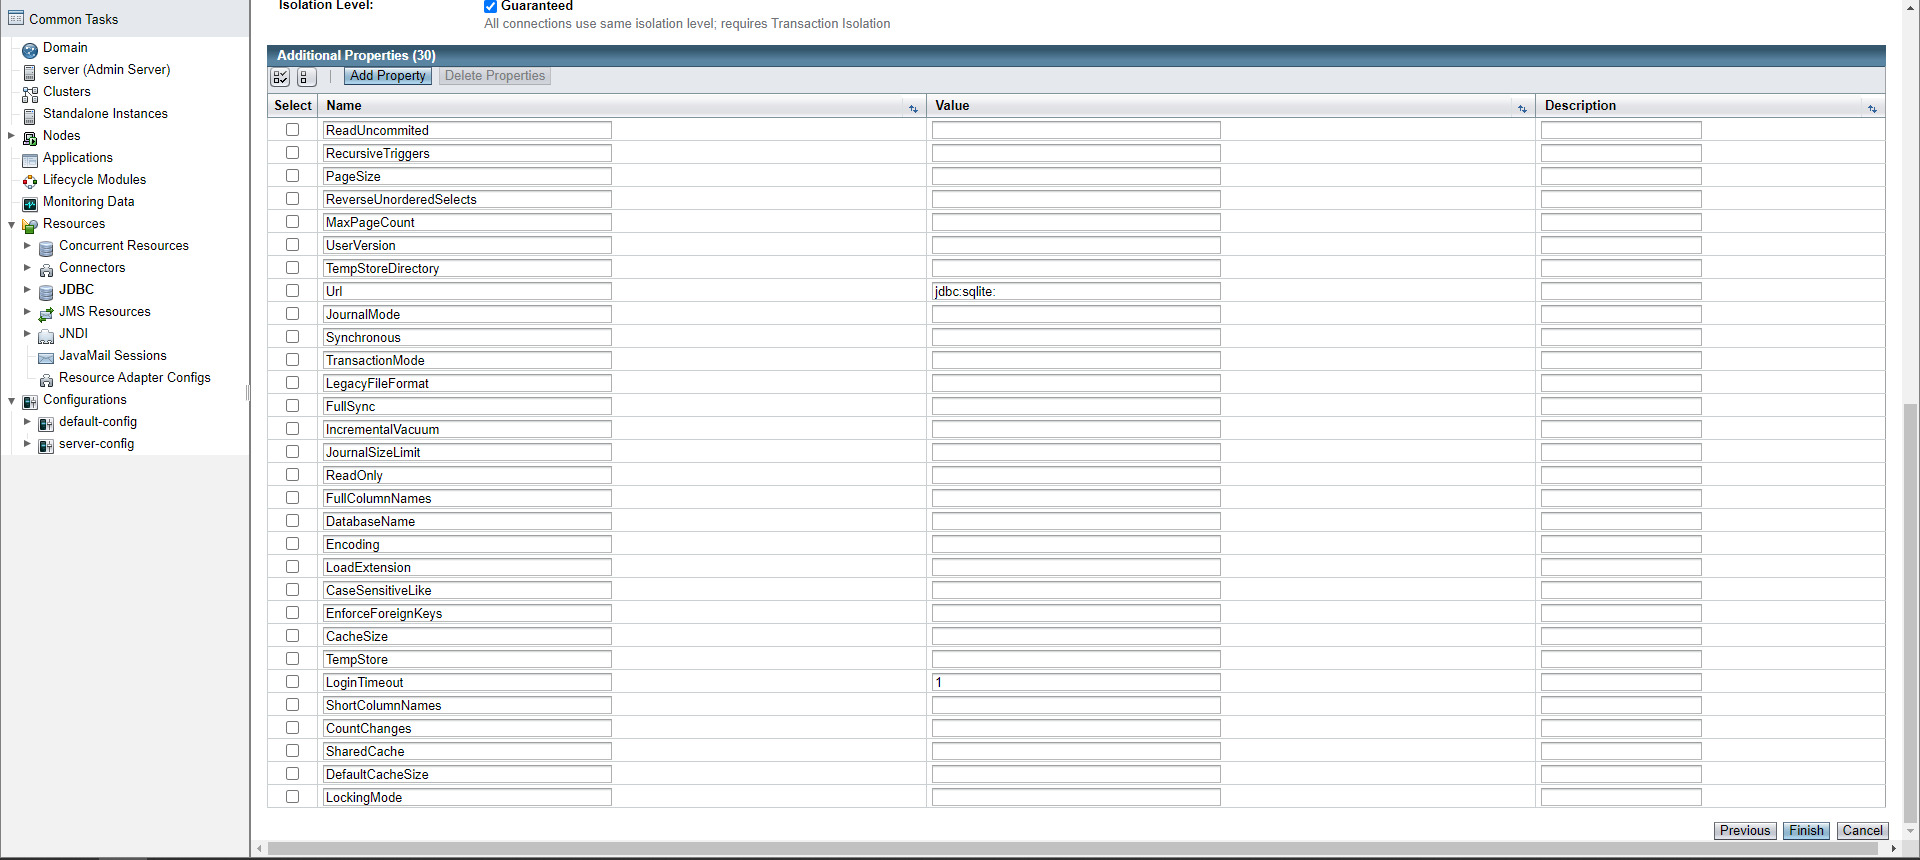
Note: this example image shows the additional properties of SQLite, other database drivers will have difference properties
Note: not all properties are required and can be left blank, in this example, only
Urlis required. Check your database drive’s documentation for what fields you need to fill in.
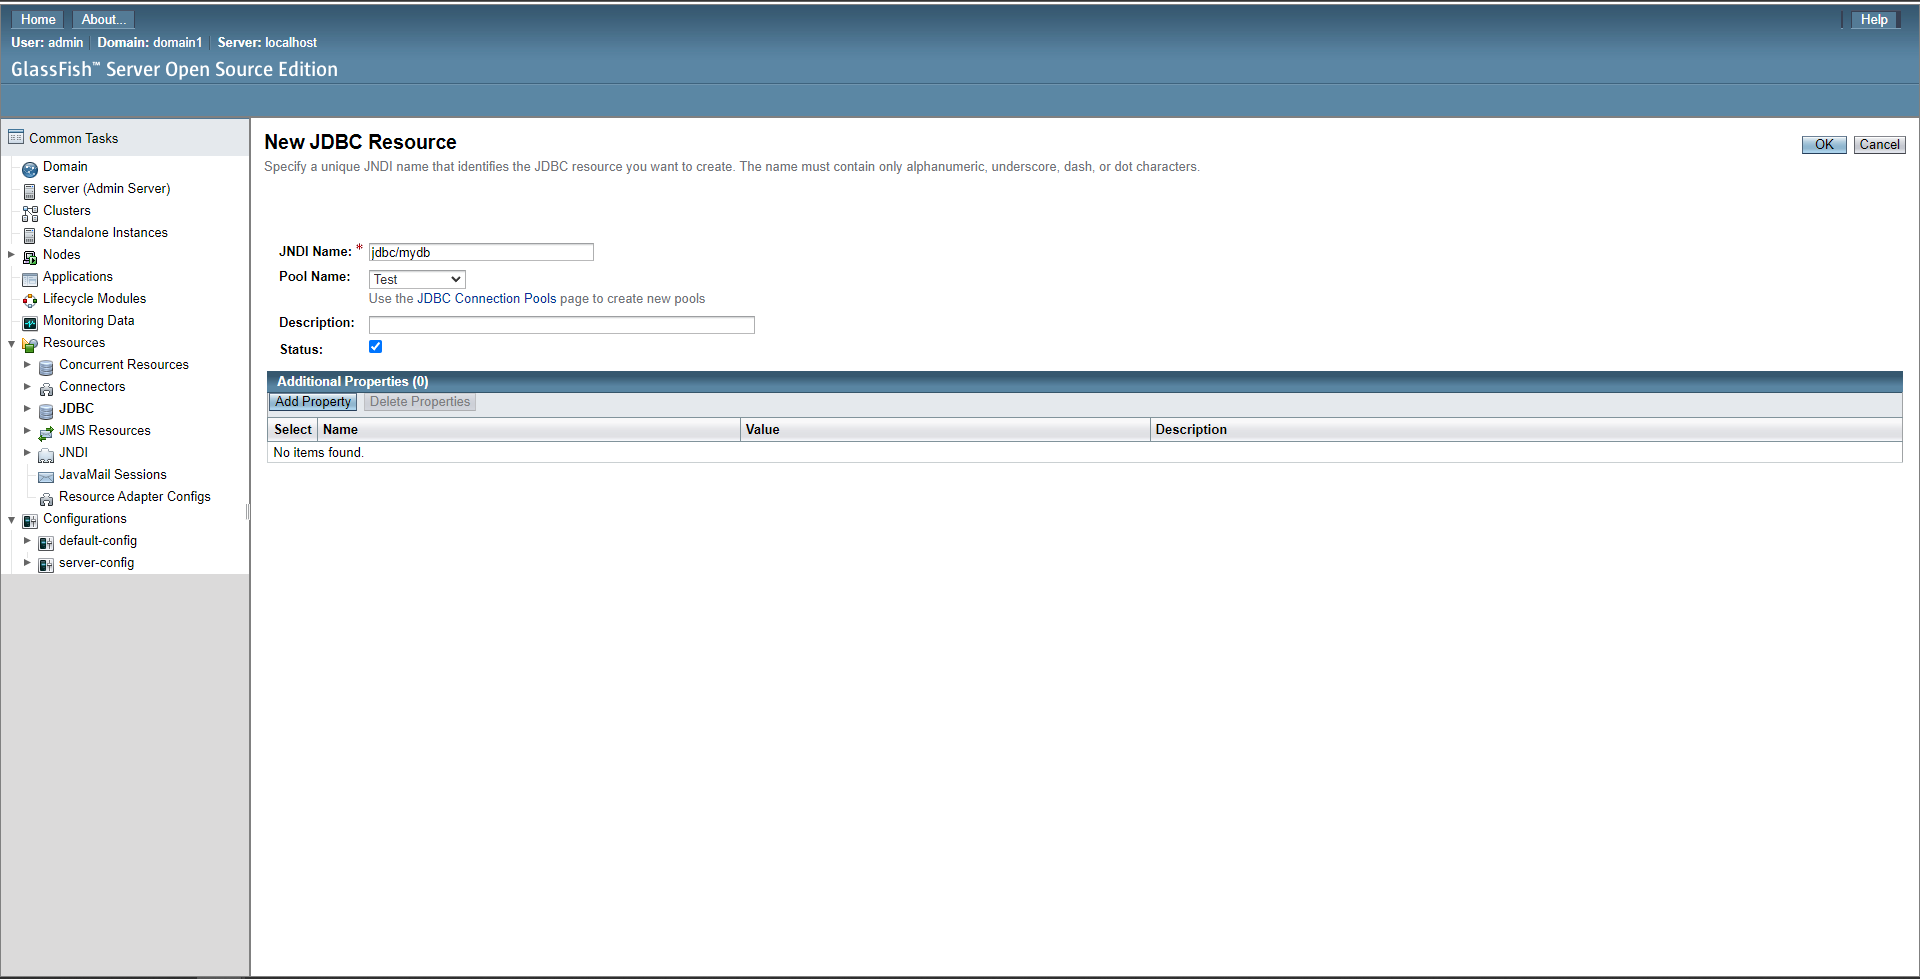
After creating the connection pool, navigate to JDBC -> JDBC Resources and create a new resource.
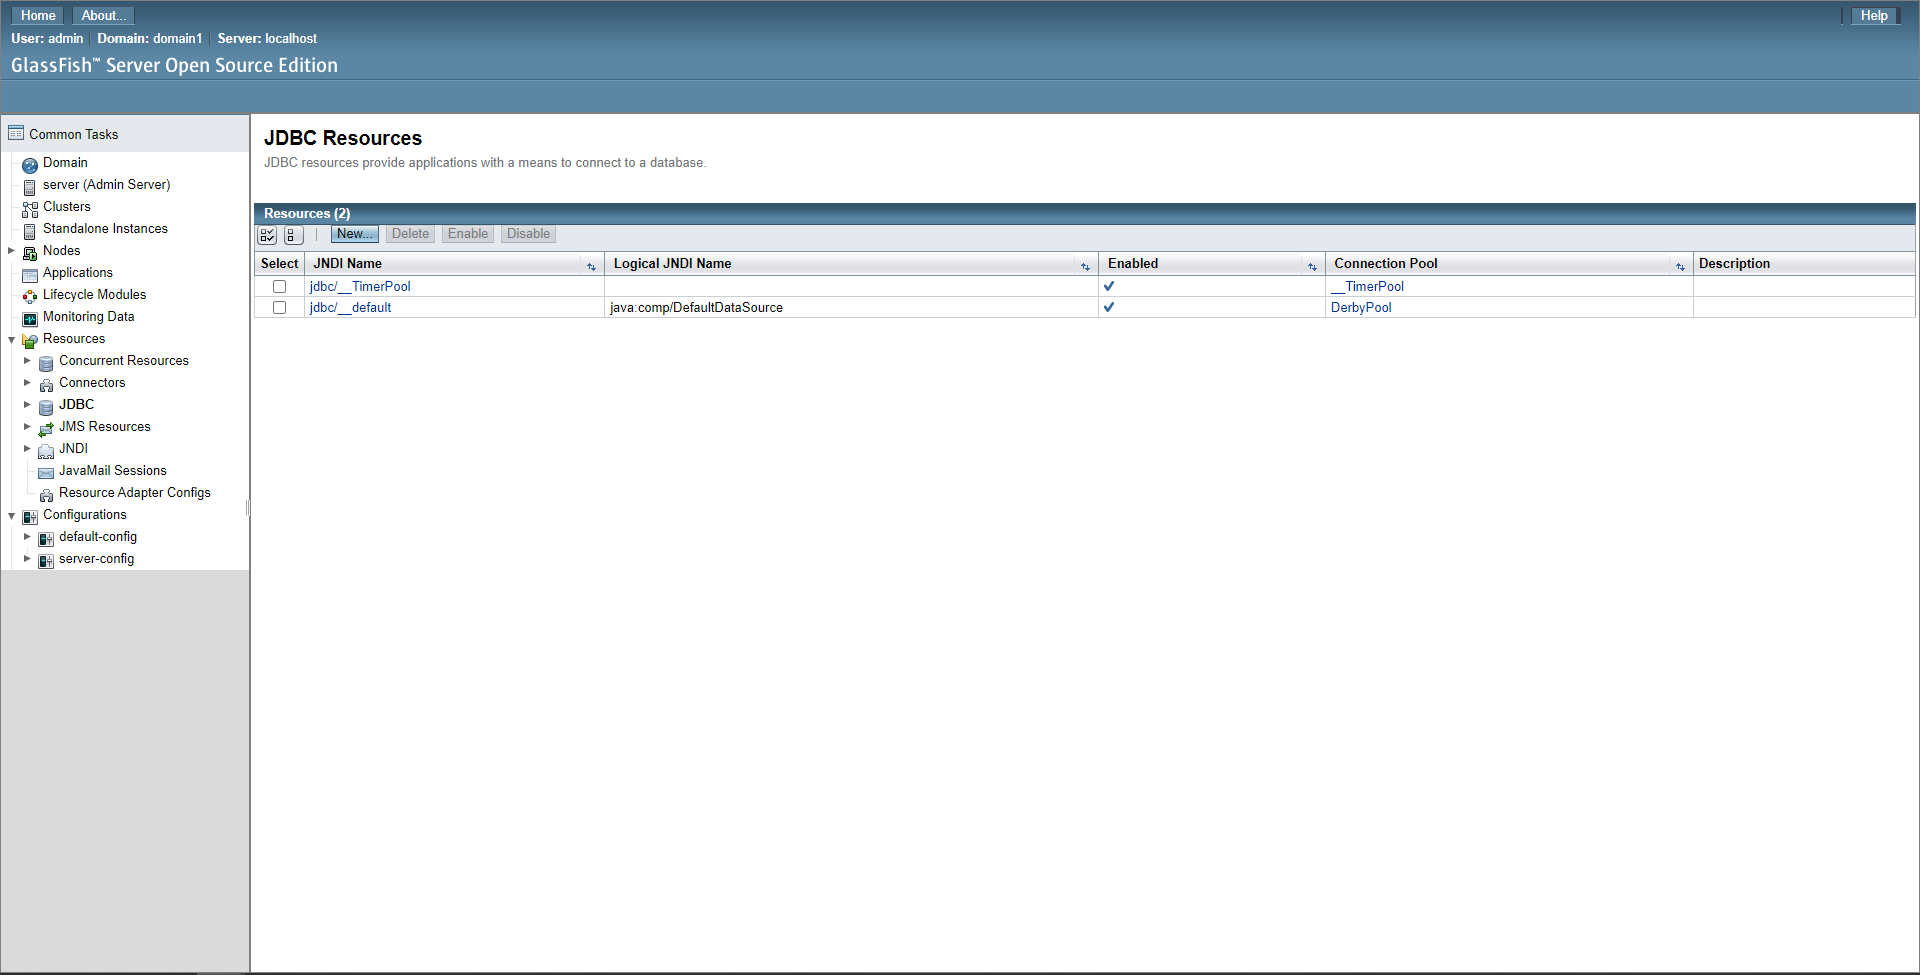
Set the name to your preference (this is the JNDI Name to put in config, and typically starts with jdbc/, for example: jdbc/myDatabase) and set the pool name to the pool we created earlier (in this example’s case it’s test), then click OK.
Configure the microservice
Finally, add the resource name you set in the previous step to the microservice config.