
Example AWS Lambda Function
JDeli is ideal for image conversion. This page will detail how to setup an AWS Lambda function that automatically converts any images uploaded to an S3 Bucket into a specified image type.
Create The S3 Bucket
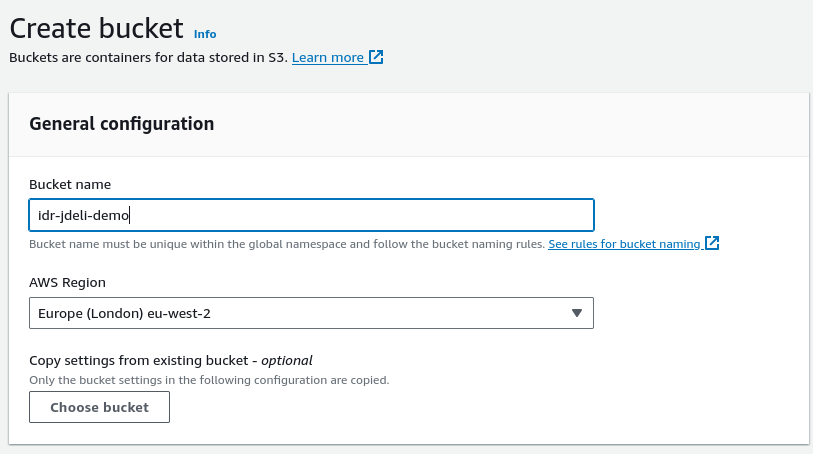
Before we begin, we need an S3 Bucket that the images will be uploaded to. Navigate to Amazon S3 → Buckets and click “Create bucket”.
Set the “Bucket Name” to something memorable, for this guide we will use idr-jdeli-demo.
Leave the other settings as their defaults.
Create The Lambda Function
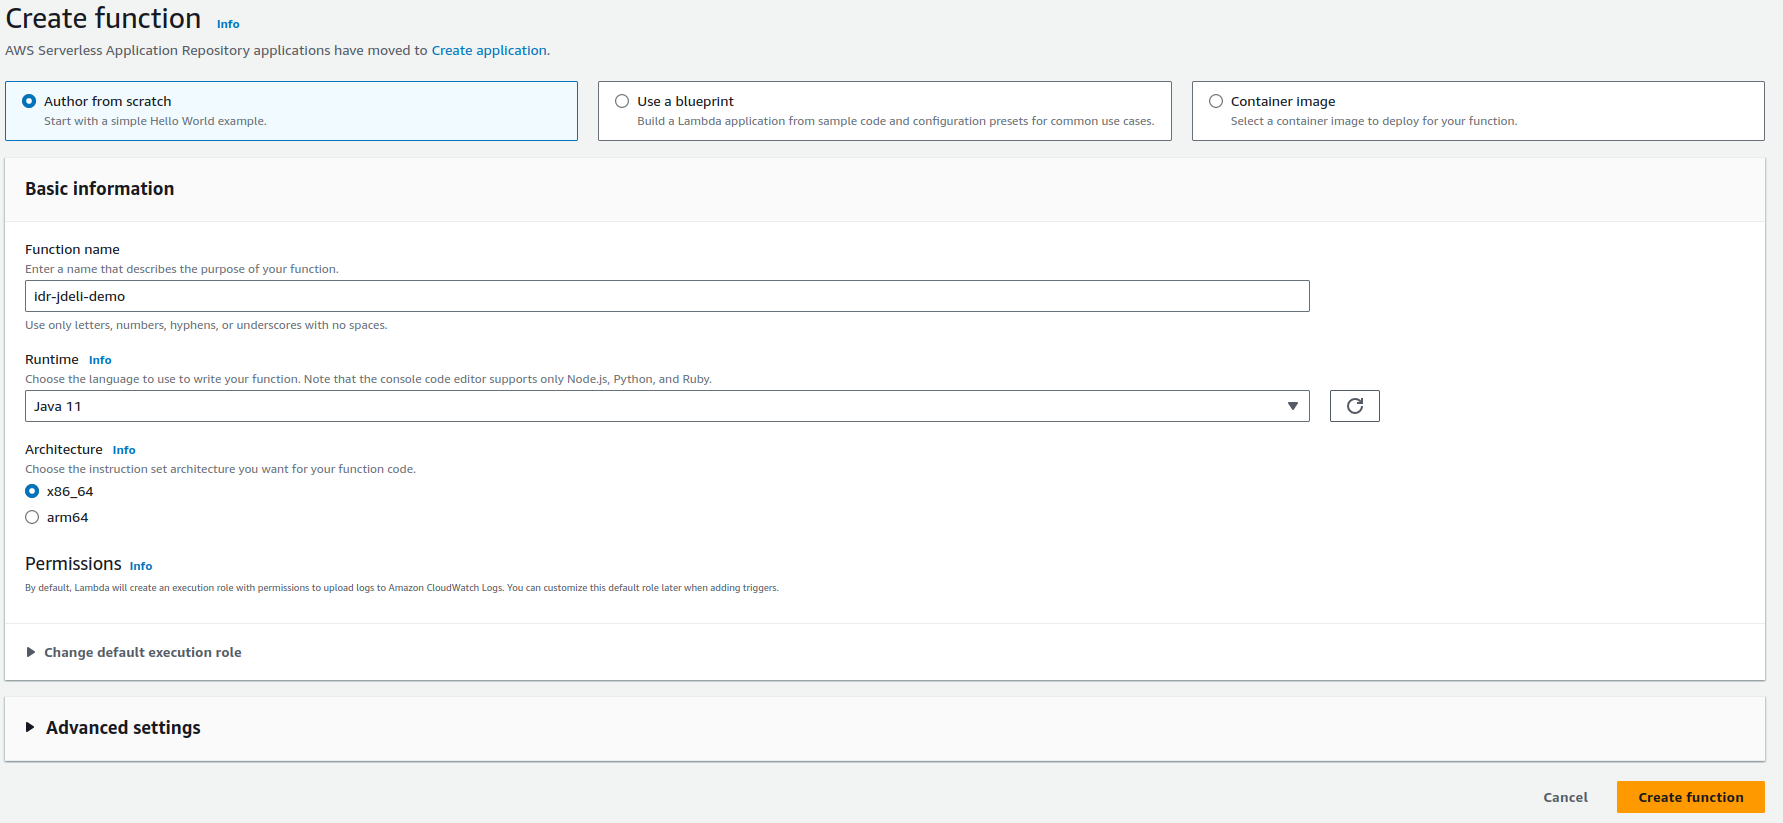
Navigate to AWS Lambda → Functions and click “Create function”.
Ensure Author from scratch is selected, give the function a suitable name (this example also uses idr-jdeli-demo for the function name), and set the runtime to Java 17 or newer. Leave everything else on its default.
Setup The Function Trigger
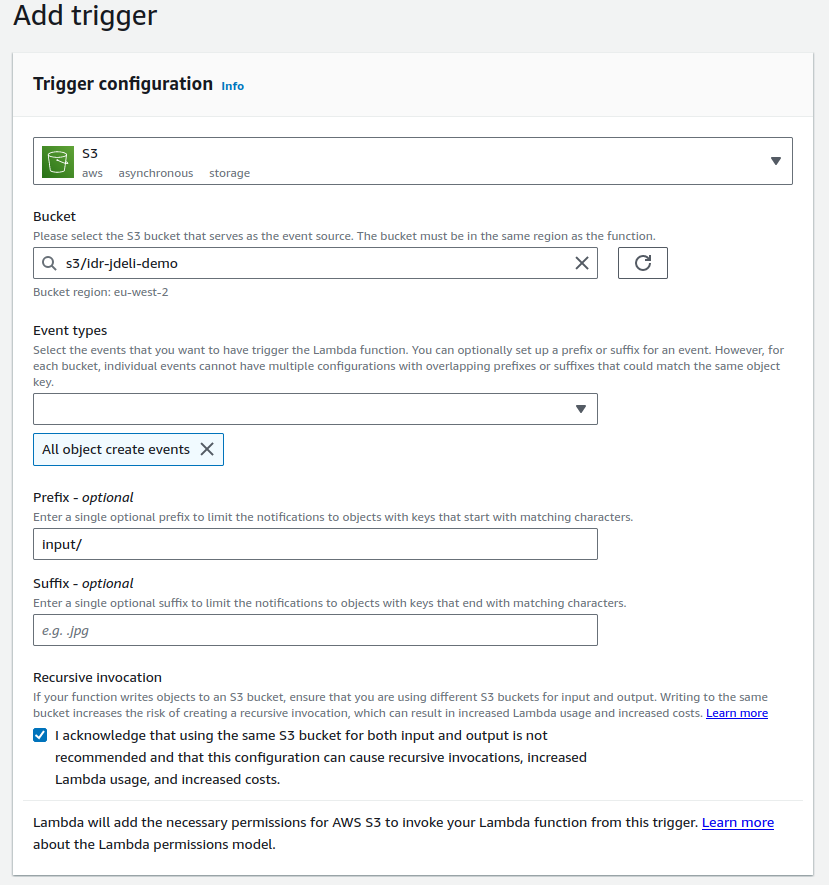
In order for the Lambda function to execute, we need to set up a trigger that will call it. As we want it to trigger on uploading an image to the bucket, we will set up a trigger for objects being created in the S3 bucket.
Click Add Trigger on the left and in the drop-down select S3.
Select your bucket and set the event types to “All Object create events”.
This example will use the same bucket for processed and unprocessed images. To do this, unprocessed images will be kept in one root directory, and processed in another. We only want to trigger on the unprocessed images, so set the prefix to the directory you will upload into. For this guide, we will use input/.
Configure The Function
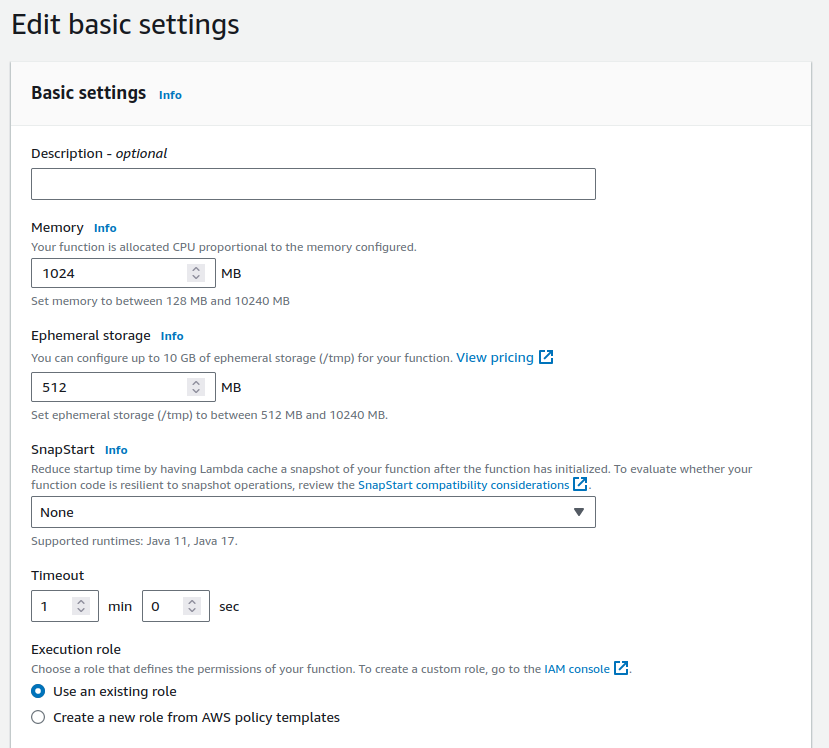
Some file conversions can consume a decent amount of memory, therefore we will need to up the amount the function can use.
Navigate to Configuration → General configuration and click “Edit”.
Set the “Memory” to 1024 (You may need more if you plan to convert really big files, but this is a good starting point).
You should also increase the “Timeout” to at least 1 minute.
Setup The Function’s Permissions
Before the Lambda function can execute, we need to give it permissions to access the Bucket.
This is done by attaching a policy with get, put, and delete permissions on the bucket.
First we need to create a new policy; navigate to IAM → Policies, and click “Create policy”.
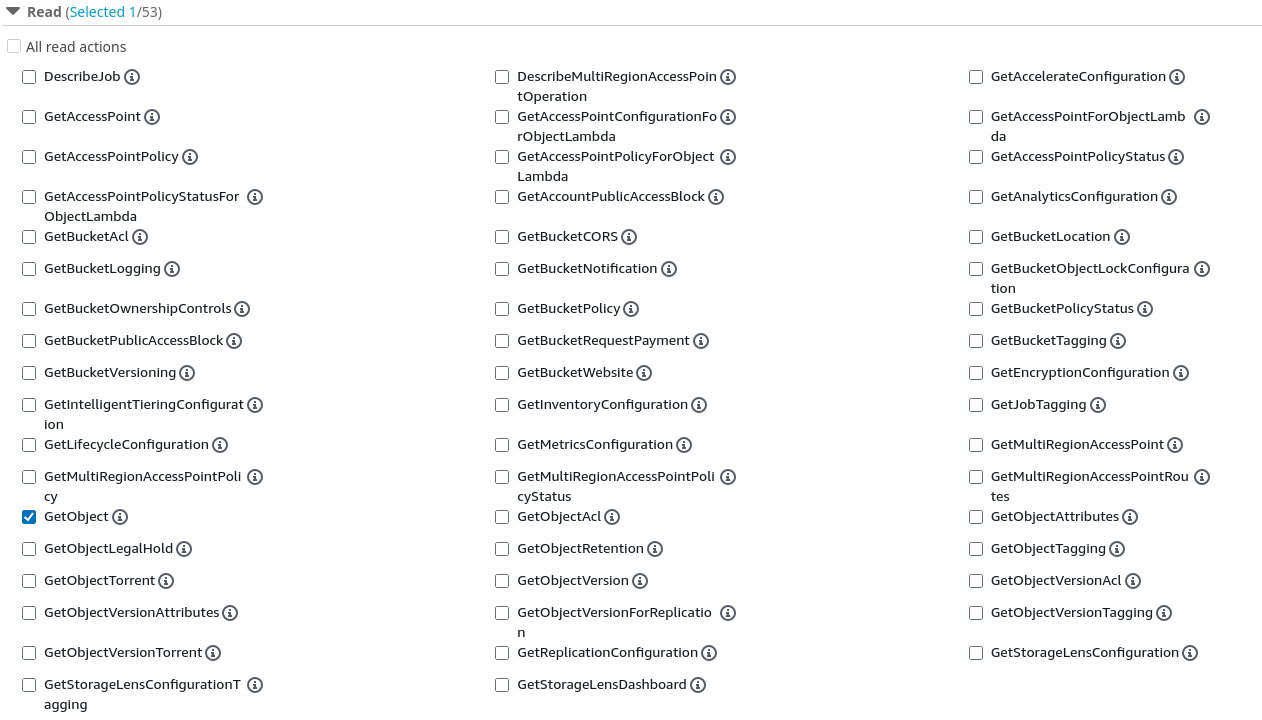
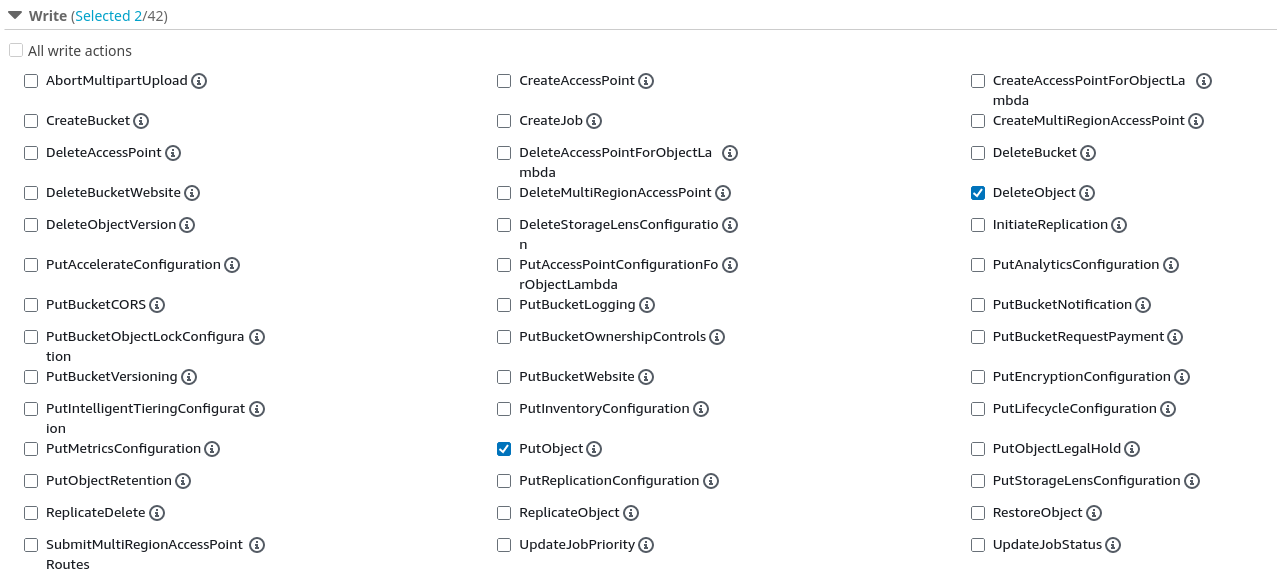
Select S3, and grant Read→GetObject, Write→DeleteObject, and Write→PutObject.
Under resources, ensure “Specific” is checked and click “Add Arn”. In the menu that pops up, set the “Resource bucket name” to your bucket’s name (for this guide: idr-jdeli-demo), and tick “Any object name”.

Click “next” at the bottom, then give the policy a friendly name and description.
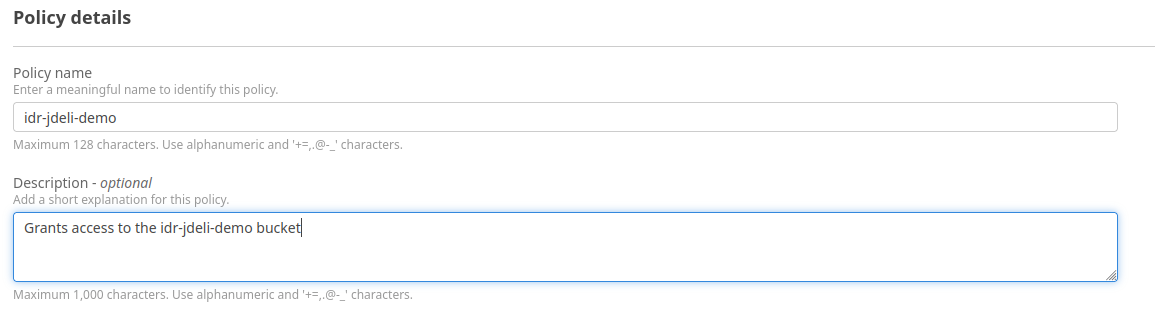
Finally, create the policy.
Now we need to attach the policy to our Lambda function.
Navigate to IAM → Roles, then select your Lambda function’s role (By default it will be the name of your role, followed by -role-xxxxxxxx, where each x is a random number or letter).
Under “Permission policies”, click Add permissions → Attach policies, and select the policy you just created

Upload the Function Code
With everything setup, we finally need to upload some code to the lambda.
This guide will use JDeli-Lambda from our GitHub as the Lambda function implementation.
This implementation will catch the S3 trigger, convert the uploaded file to the configured format, then upload the converted file into the configured output directory in the bucket. It also has some extra bells and whistles, like protection against recursive execution (triggering the function again with the uploaded converted file) using metadata and deleting source images after they’ve been converted.
Full instructions for deploying the project to Lambda can be found in its readme, but the quick version is:
Build the project with
mvn clean package
Then Deploy with the AWS CLI:
aws lambda update-function-code --function-name idr-jdeli-demo --zip-file fileb://target/jdeli-lambda-1.0-SNAPSHOT.jar
replacing idr-jdeli-demo with the name you gave your Lambda function.
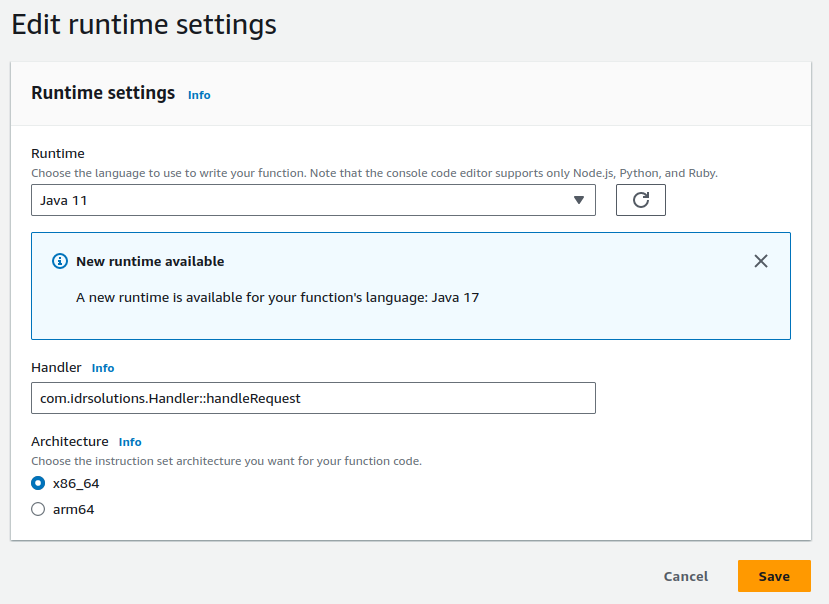
Finally, on your Lambda function, goto Code → Runtime settings and click Edit, then set the handler to
com.idrsolutions.Handler::handleRequest
Finished
The Lambda function should now be setup. You should now be able to upload images to the input directory of your bucket and have them automatically converted and placed in the output directory.