
How to setup in Maven
JPedal is a Java PDF library that allows developers to view, print, rasterize and extract content from PDF files in their own Java applications.
This tutorial shows how to set up a Maven project using the JPedal jar for development.
Please note: A trial or full copy of the JPedal jar is needed.
Step 1 - Setup Maven repo and add JPedal code examples
Create the following directory structure:
<project_directory>
|_lib
|_src
|__main
|___java
Get the example file that we have up on GitHub.
Either:
- Run git clone https://github.com/idrsolutions/jpedal-code-example.git from a command line
Or
- Click “Code” -> “Download ZIP” and extract the JPedalExamples.java file

Copy JPedalExamples.java into the src/main/java folder
<project_directory>
|_lib
|_src
|__main
|___java
|____JPedalExamples.java
Create a new file called pom.xml and copy the following contents into it.
<?xml version="1.0" encoding="UTF-8"?>
<project xmlns="http://maven.apache.org/POM/4.0.0"
         xmlns:xsi="http://www.w3.org/2001/XMLSchema-instance"
         xsi:schemaLocation="http://maven.apache.org/POM/4.0.0 http://maven.apache.org/xsd/maven-4.0.0.xsd">
    <modelVersion>4.0.0</modelVersion>

    <groupId>org.example</groupId>
    <artifactId>jpedal-example</artifactId>
    <version>1.0-SNAPSHOT</version>

    <dependencies>
        <dependency>
            <groupId>com.idrsolutions</groupId>
            <artifactId>jpedal</artifactId>
            <version>1.0</version>
        </dependency>
    </dependencies>
</project>
Step 2 - Install JPedal jar (trial or full version)
Find your copy of the JPedal jar file and move the jar into the lib directory.
<project_directory>
|_lib
|__**jpedal.jar**
|_src
|__main
|___java
|____JPedalExamples.java
Open the command line in the lib directory and run the following command
mvn install:install-file -Dfile=jpedal.jar -DgroupId=com.idrsolutions -Dpackaging=jar -DartifactId=jpedal -Dversion=1.0
Once done, the dependency can be added to your project. This is already done for the example pom but can be achieved with the <dependency> tag.
Step 3 - Run in Preferred IDE
Open your preferred Java IDE
Select Open project:
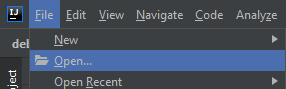
- IntelliJ IDEA (Open)
- Eclipse (Import -> Maven -> Existing Maven Projects)
- NetBeans (Open Project)
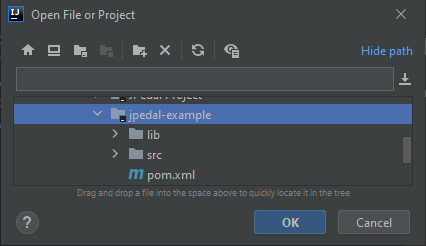
Select the project folder
Step 4 - Start coding
Uncomment the action that you want to try out from the examples
public static void main(String[] args) {
    try {
        pdfToImage();
//        pdfViewer();
//        extractWords();
//        extractImages();
    } catch (final Exception e) {
        e.printStackTrace();
    }
}
Change the parameters of the action to point to the correct input/output
public static void pdfToImage() throws PdfException {
    ConvertPagesToImages.writeAllPagesAsImagesToDir("inputFile.pdf",
            "outputFolder", "png", 1.33f);
}
Click the run button.
Want to add more to your project?
Check out the following tutorials for more information to see what JPedal can do for you:
- Convert PDF to an Image
- View PDF in Java
- Print PDF from Java
- Search the Text in PDF
- Extract Text from PDF
- Extract Images from PDF
- Extract Metadata from PDF
- Edit PDF Form Annotations